Overview
This procedure covers the following:
Step-by-Step Process
Create a New Query
- Click the Web Intelligence tile in the Applications section of the BusinessObjects home page.
- Verify SAP BI Platform Repository and Universe are selected on the Select a Data Source window.
- Click OK.
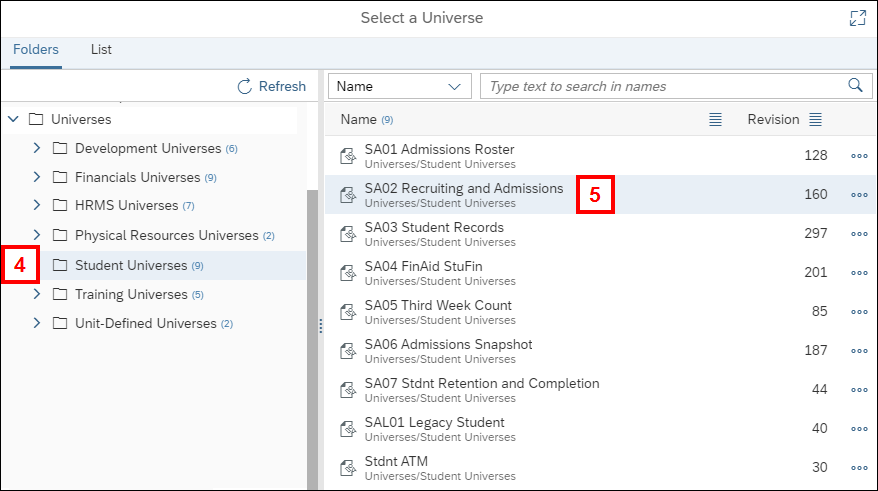
- Click the Universe.
- The universes and data sets that display are the ones to which you currently have access.
- Click the Data Set.
- Click OK.
Select Result Objects
- Open the folder in the left-hand panel that contains the object you want.
- To search for an object by name, enter the name in the Type here to filter the tree text box.
- An object may display in multiple folders. Use the data set's data dictionary to determine which folder to use.
- Double-click an object in the left panel to add it to the Result Objects section.
- You can also drag and drop an object from the left panel into the Result Objects section, or click the object and use the Add Object
 arrow in the Result Objects section.
- You can also drag and drop an object from the left panel into the Result Objects section, or click the object and use the Add Object
- Repeat steps 7-8 until all needed query filters are added.

Note: To remove an object from Result Objects, select it and click the Remove Object  arrow, or click Delete
  on the object.
Create Query Filters
- Drag an object from the left-hand panel to the Query Filters section, or click the object in the left-hand panel and click the Add Filters arrow in the Query Filters section.
- If the object is already in the Result Objects section, you can drag it from there to Query Filters.
- If needed, select an operator other than the default In list from the Operator drop-down list.
- Enter a value (constant) in the Type a constant text box, or click Define Filter Type
 to select a value from a list or create a prompt.
- Most lists of values are case-sensitive.
- If you select Prompt, the user will be prompted to select a value for this object each time the query is run.
- If you select Value(s) from list, the values window displays. Check the box next to a value to select it. If the list is long, use the search bar to find a specific value. Some operators, such as Equal to, allow only one value, while others allow you to check multiple values. Click OK after you have selected all values.
- Repeat steps 10-12 until all needed Query Filters are added.

Note: To delete an object from Query Filters, select it and click the Remove Filter arrow, or click Delete on the object.
Run the Query
- Click Run on the Query Panel.
- The Retrieving Data dialog box displays.
- Click Cancel to end the query, if necessary. If it is a long-running query, you may need to call the ITS Service Center to cancel it.
Save Document
- Click Save
 and select Save As.
 - Select the applicable folder in My Folders.
- Enter a File Name, if you want to change the report name.
- Click Save.
Note: You can also export the report as an Excel, PDF, CSV, or CSV. For more information on export options, see Export Data to Excel, CSV, or PDF.