Overview
nVision is a reporting tool for running and viewing financial management reports (e.g., Source/Use, income statements).
Important Information
The nVision report used as an example, No Drill-Sources/Uses Rpt-Mnth, requires a Scope value. nVision reports that do not require a Scope value are run directly to a window on your desktop, bypassing steps 14 – 16 of this procedure. Most nVision reports require a Scope value.This procedure demonstrates locating the report to run using its Description (i.e., title). If you know the nVision report's Report ID (e.g., MGLN074B), enter it in the Report ID field with the applicable search condition (e.g., =) to run the report. See Other Helpful Information for additional information and documents describing nVision reporting functions.
Navigation
NavBar > Navigator > Reporting Tools > PS/nVision > Define Report Request
Step-by-Step Process
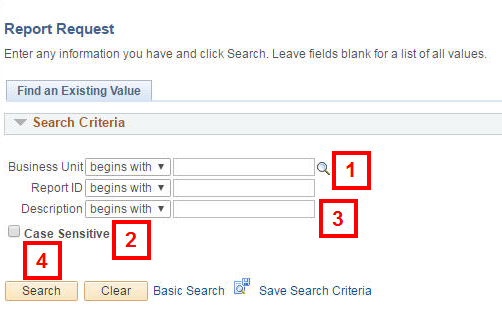
- Enter UMICH in the Business Unit field.
- Select contains from the conditions in the Description drop-down list.
- Enter a value contained in the title of the report (e.g., a value of source returns the Source/Use reports).
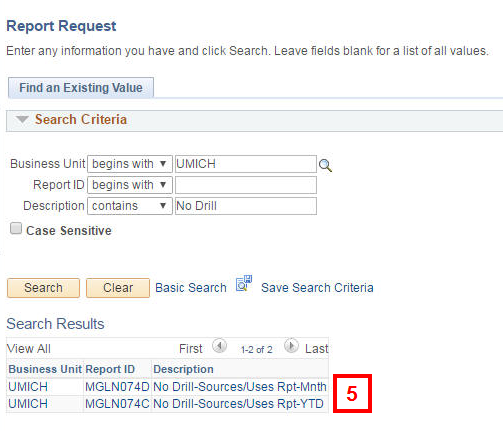
- Click Search.
- Click the Report ID link for the desired report. (e.g., UMICH, MGLN074D, or No Drill-Sources/Uses Rpt-Mnth).
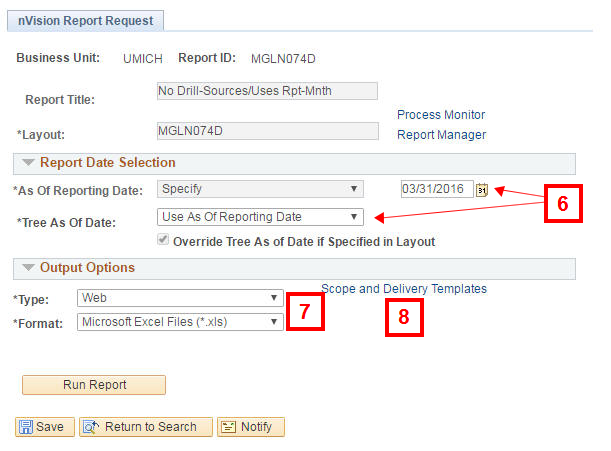
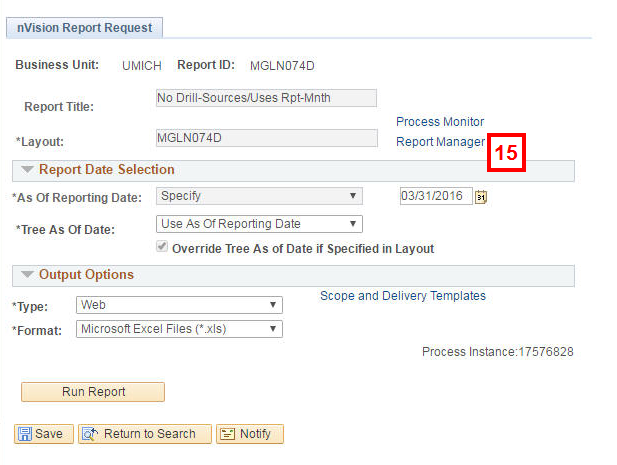
- Complete the following fields in the Report Date Selection group box:
- Enter a date in the As of Reporting Date field.
- Verify Use As Of Reporting Date displays in the Tree As Of Date field.
- Complete the following fields in the Output Options group box:
- Select Web from the Type drop-down list.
- Select Microsoft Excel Files (*.xls) from the Format drop-down list.
- Click Scope and Delivery Templates.
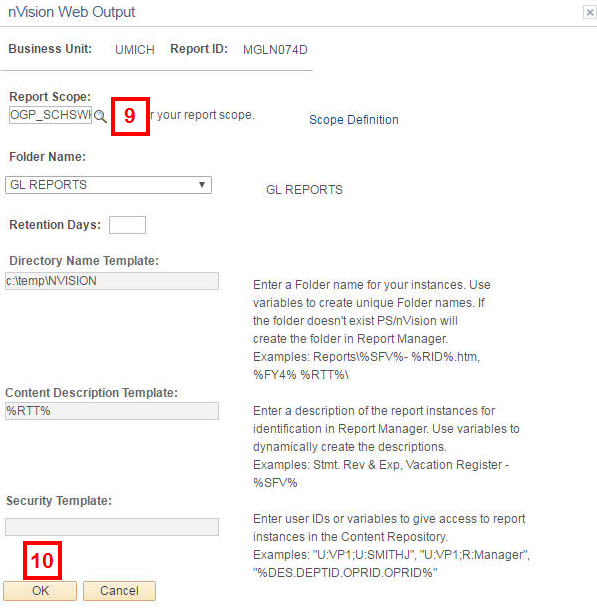
- Enter a Report Scope (e.g., DEPT212000 or OGP_COLENG).
Notes:
- A value that may not be your DeptID or Dept Grp defaults in the Report Scope field. Overwrite this value as necessary.
- Select a batch folder from the Folder Name drop-down list if you want the report to appear in a specific folder in the Report Manager. Leave this field blank to route the report to the General (default) folder.
- Click OK.
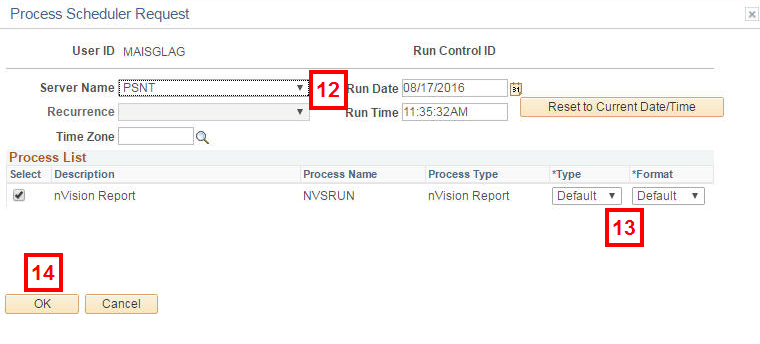
- Click Run Report.
- Select PSNT from the Server Name drop-down list.
- Verify the Type and Format fields each display a value of Default.
- Click OK to run the report.
- Click Report Manager.
- If you receive a Save Warning message, click Cancel to continue to the Report Manager.
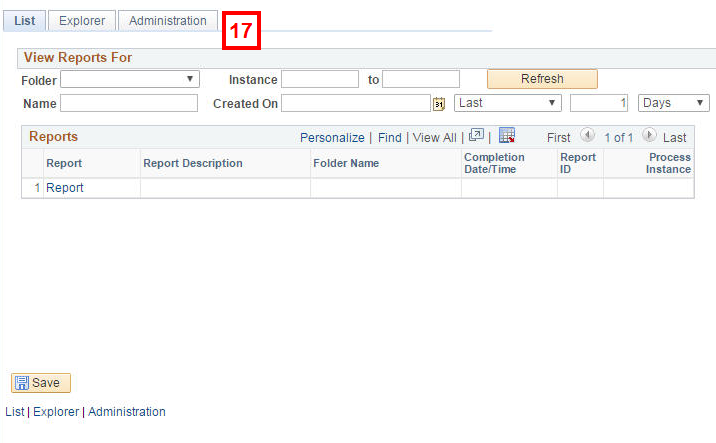
- Click the Administration tab.
Note: If your report doesn't appear in the Report List grid when you open Report Manager, the server is still processing it. Click Refresh to update the page.
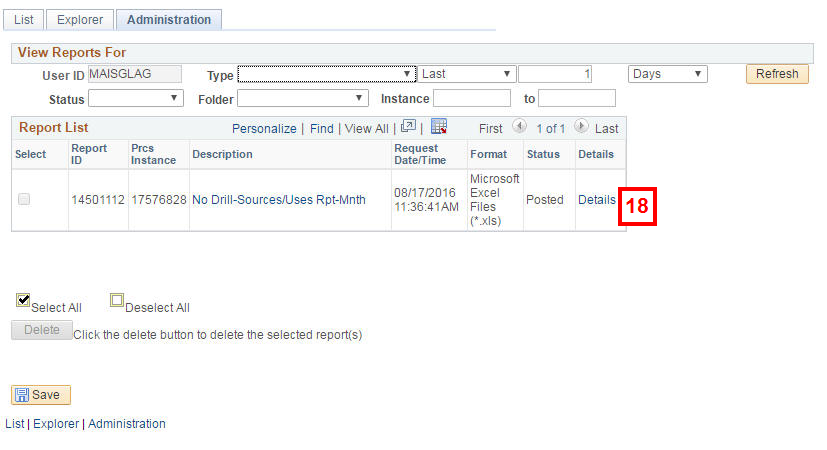
- Click the link in the Details column to view the applicable report type.
Note: IE 8 users: M-Pathways must be a Trusted Site to open an Excel report in an M-Pathways window. If clicking the Description link doesn’t open the File Download dialog box, see Administrative Systems: Settings and Troubleshooting for instructions.
- Click Open to display the report in an Excel spreadsheet in the Web browser window.
Note: Click Save to save the report as an Excel file in a folder on any computer drive to which you have access.
- Verify the report opens in a window within your Web browser.
- Select Print from the Start menu.
- Click Close to exit the report.
View Find an Existing Value Page Screenshot
View Search Results Screenshot
View nVision Report Request Page Screenshot
View nVision Web Output Sub-Page Screenshot
View nVision Report Request Page Screenshot

View Process Scheduler Request Page Screenshot
View nVision Report Request Page Screenshot
View Report Manager - Administration Page Screenshot
View Administration Page Screenshot
Other Helpful Information
To distribute an nVision report to another user’s Report Manager when you run the report, select Web from the Type drop-down field on the Process Scheduler Request page. When you do this, the Format value changes to XLS and the Distribution link appears.
Clicking the Distribution link opens the Distribution Detail page. For nVision reports, the distribution list is associated with the instance (i.e., the time and date the report is processed by the server). When you, or another user, subsequently run the nVision report (e.g., MGLN074D) the Distribution Detail page clears. This clearing function is unique to nVision reporting.
See Distribute a Report for general instructions on how to set up a distribution list when running a report.
Unless specifically stated as a monthly report in the report title, nVision report data is an accumulated total of the financial activity since the start of the fiscal year (i.e., July 1st). In other words, these reports deal with “as of” dates. The nVision Report Request page asks you to specify the As of Reporting Date in MM/DD/YY format to identify the fiscal year and the transaction cut off date for the report.
Most nVision reports provide year-to-date financial data for either a specific department or for a larger Department Group. A Department Group represents a school/college, such as LS&A or Dentistry, or large Administrative areas, such as Financial Operations. Included in the Department Group are the individual Departments that make up the larger organization.
The Scope field accepts two types of values: DeptID or the Dept Group. If you want information for an individual department, use the DeptID (e.g., DEPT173500 for the Chemistry department. If you want a broader level of data, use a Dept Group. nVision uses the prefix OGP for the Scope value. The Dept Group for LS&A is OGP_COLLSA.
See nVision Department Group Scope Values to locate the Dept Group value for your organization.