Overview
This procedure describes how to use M-Pathways to create Online Journal Entries (JEs). Creating the JE is the first part of the journal entry process:
- Create JE
- Post JE
- Approve JE (if necessary)
Refer to Questions to Consider before Creating a Journal Entry to verify that creating a JE is the appropriate corrective action.
Refer to Journal Entries: Troubleshooting and Process Descriptions if you receive Edit or Budget Check errors during the Post Journal process. This document also describes additional processes you can complete from the Journal Entry Lines page.
Refer to Create an Online Journal Entry to enter a single JE with few lines online in M-Pathways.
Create JEs
Upload multiple JEs into M-Pathways at the same time or efficiently enter one JE with many (up to 100) lines. The Journal Upload process includes filling out an Excel template, creating a data file, and uploading that data file into M-Pathways.
This procedure is divided into two sections:
- Uploading the JE Data File
Complete this section to upload JEs from the spreadsheet template.
- Correcting Data File Errors and Uploading the Error File
Complete this section if you encounter errors while uploading the data file.
Navigation
Main Menu > General Ledger > Journals > Import Journals > Journal Upload
Uploading the JE Data File
- This procedure begins at the point of uploading the complete Journal Upload template.
- The Journal Upload Template (Microsoft Excel file) is located on the Financial Operations website. Ensure that you have the most current version of the template before starting the upload process.
- If a JE contains both sponsored and non-sponsored activity, it is treated as a sponsored JE by the M-Pathways system. All sponsored journals are routed to Sponsored Programs for approval prior to posting.
- Sponsored activity is indicated by an Initial Fund value of 20000 or 25000 on a Project/Grant beginning with C, F, M, N, or R.
- As the data file is loaded, the system performs several edits of the data and Journal IDs are assigned. JEs that pass the edits are successfully loaded into M-Pathways. JEs that fail any edits are not loaded into the system, and you must correct errors, and then re-upload the JEs to M-Pathways (see Section II). Run the Journal Upload process completely before attaching and loading another data file. If you attempt to load another JE data file before the current process has finished, the second process will fail.
Run the Journal Upload process completely before attaching and loading another data file. If you attempt to load another JE data file before the current process has finished, the second process will fail.
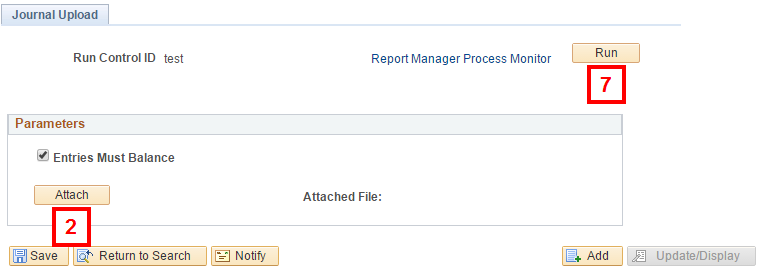
- Follow the steps in M-Pathways Run Control ID Information to enter or add your Run Control ID.
- Click Attach.
Journal Upload Page Screenshot
- Click Choose File to search for and select the file path for your saved JE data file.
Note: The JE data file must have a .dat file extension in the file path. If you need instructions for creating the .dat file, refer to the first tab of the Journal Upload Template.
- Navigate to and select the data file.
- Click Open.
- Click Upload.
- Click Run.
- Select blank from the Server Name drop-down list.
Process Scheduler Request Page Screenshot
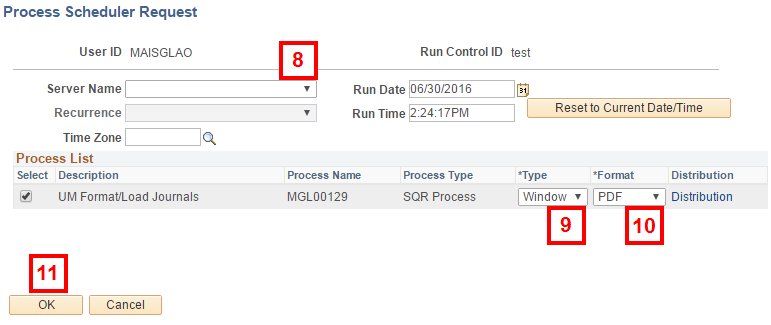
- Select Window from the Type drop-down list to have the status report run to the Report Manager.
- Select PDF from the Format drop-down list.
- Click OK.
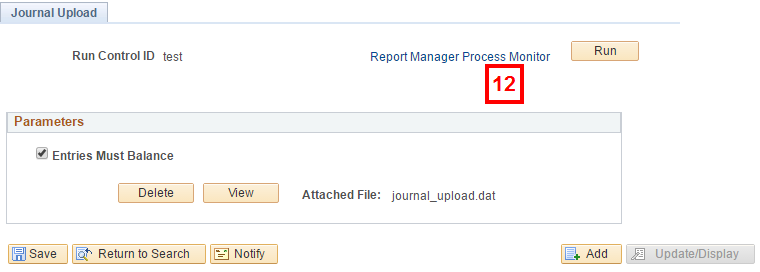
Note: M-Pathways returns to the Journal Upload (Parameters) page while M-Pathways runs the upload process and creates the status report.
- If the Journal Load Status Report fails to open in a new window, click Process Monitor to verify the process status and obtain the Journal Load Status report.
Journal Upload Page Screenshot
- Verify that the Run Status field in the Process List displays a value of Success.
Note: Click Refresh to update the page if the Run Status field value is Queued or Processing.
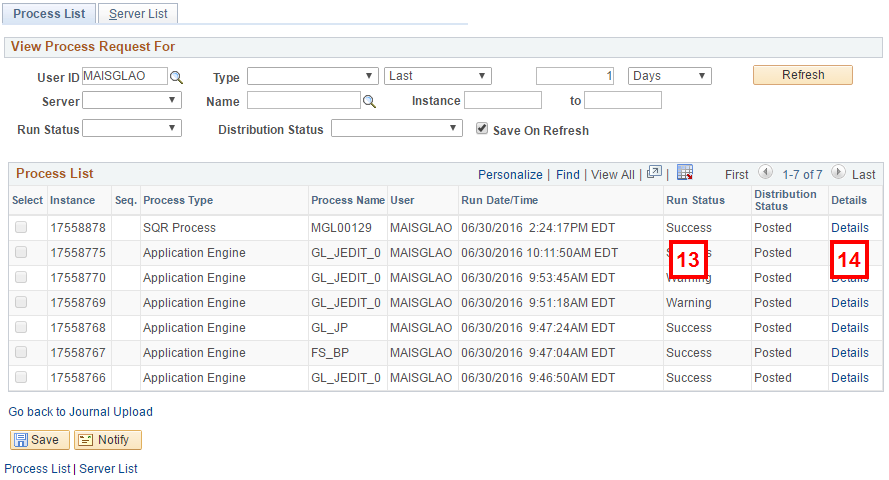
- Click Details.
Note: If multiple rows of data appear in the Process List group box, the values in the Instance and Run Date/Time fields should help you to identify the correct Journal Upload process to view.
- Click View Log/Trace.
Process Detail Page Screenshot
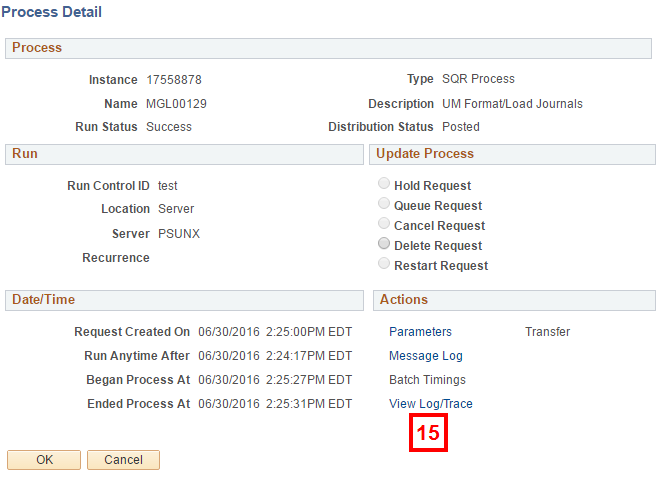
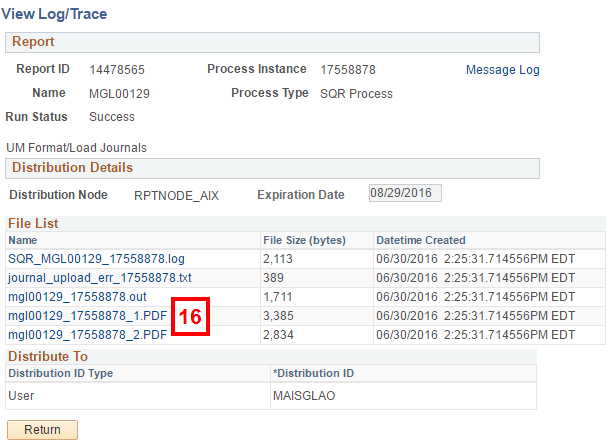
- Click the link ending in 1.PDF to view the Journal Entry Load Status report in a window on your desktop.
View Log/Trace Page Screenshot
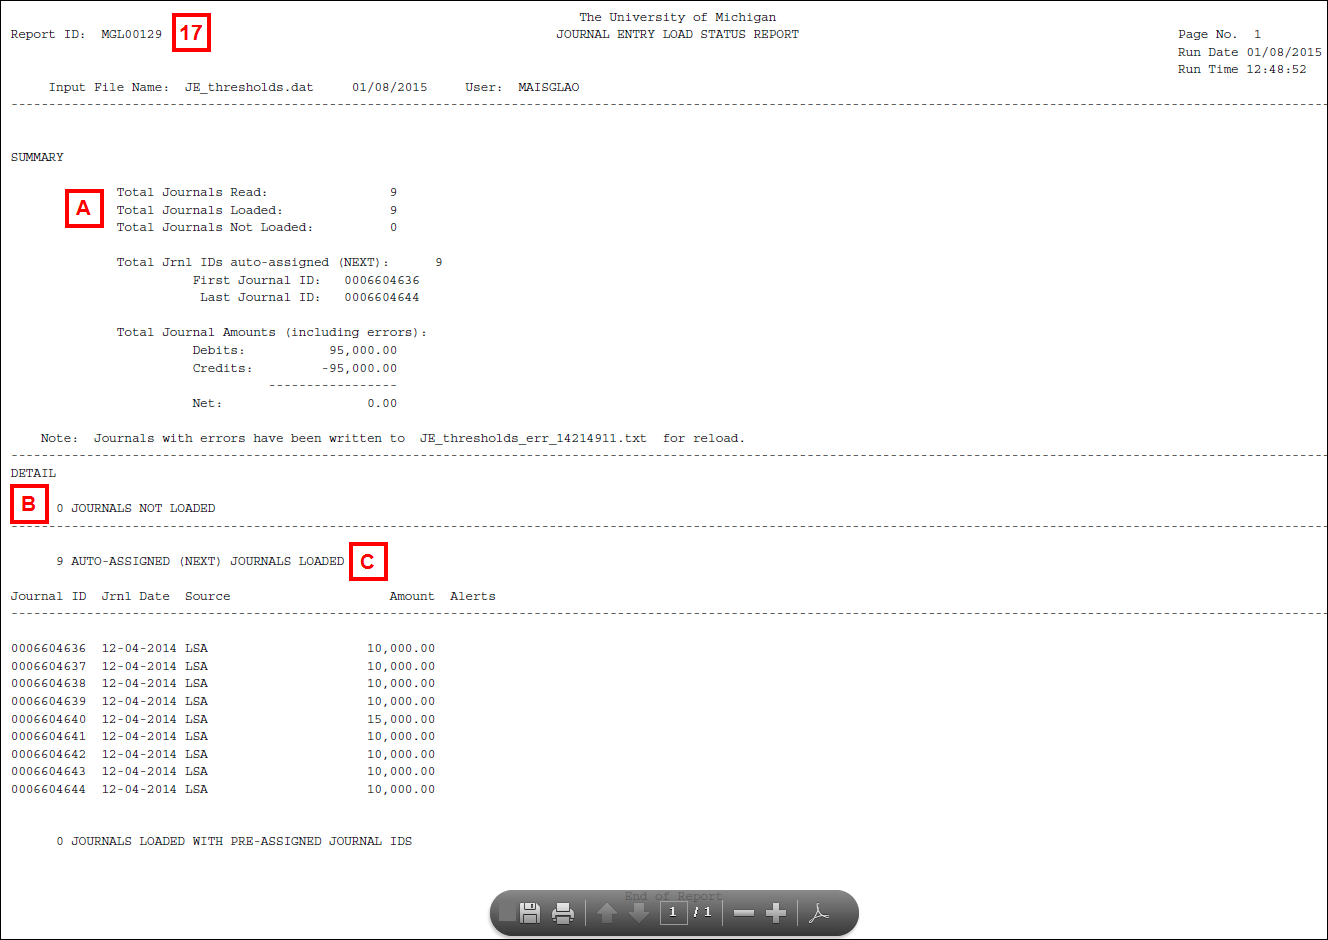
- Review the following sections of the status report to determine if any errors occurred in the data file:
- Summary – lists the number of JEs that were loaded into or rejected from M-Pathways during the process, the Journal ID range for the auto-assigned JEs, and the total amount (including a Net balance) for the upload process.
- Detail – Journals Not Loaded – displays the detailed journal header and line error(s) for the rejected journals and lists the file you need to locate and use to correct the errors.
- Detail – Journals Loaded – lists the JEs loaded, their total debits, and any applicable alerts about the JE.
Note: Refer to Correcting Errors and Loading the Error Data File if the report displays errors.
Journal Entry Load Status Report Screenshot
- Click Close to close the report and return to the Parameters page.
Notes: If the Total Journals Not Loaded field:
- Equals 0 (zero), no errors occurred and the upload process completed successfully. You can now post the journals in M-Pathways. Refer to Post Journal Entries (JEs) for instructions.
- Doesn’t equal 0 (zero), go to the next section of this document to retrieve the system-generated error file, and to create a new upload file with corrected JEs.
Correcting Errors and Loading the Error Data File
The following is a continuation of the previous section of this document and is based on the assumption that you encountered errors when uploading the JE data file. This procedure walks you through:
- Retrieving and saving the system-created text file containing Journal Upload process errors.
- Importing the JEs with errors into a blank Journal Upload Template.
- Correcting JE errors.
- Uploading the corrected JEs to M-Pathways.
Navigation
When you close the Journal Entry Load Status report window (described in Section I), the system returns to the View Log/Trace page.
Alternative navigation to the Process Monitor is: NavBar > Navigator > PeopleTools > Process Scheduler > Process Monitor.
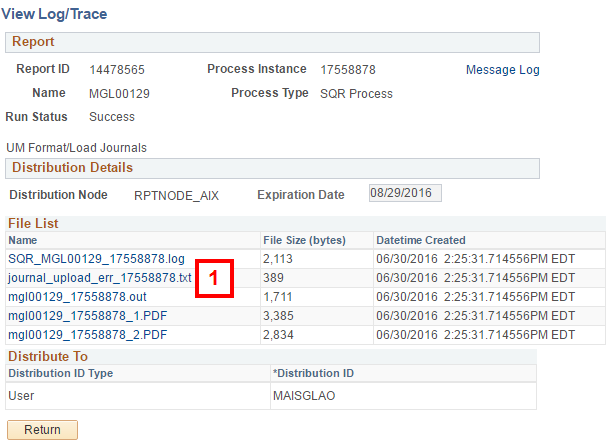
- Click the link ending in .txt to open the text file in a new window.
Note: M-Pathways names the text file containing the errors with the following naming convention: data file name_err_instance #.txt.
View Log/Trace Page Screenshot
- From the .txt file window, select: File > Save As (or Page > Save As) from the browser menu.
- Save the file.
- Open an empty Journal Upload Template (not shown).
- Click Enable content.
Journal Upload Template Screenshot
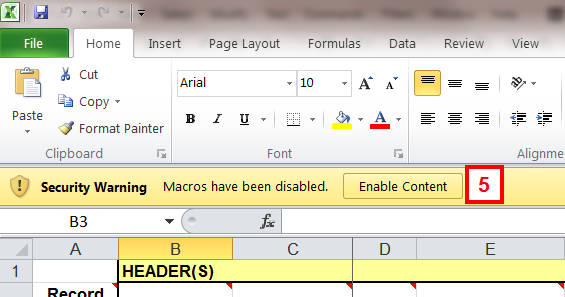
- Click Yes.
- Click the Developer tab.
If the Developer tab is not displayed:
- For Windows: Select File > Options > Customize Ribbon. Under the Customize the Ribbon section, select Main Tabs from the drop-down list, check the Developer box and click OK.
- For Mac: Select Excel > Preferences... > Ribbon. Check the Developer box and click OK.
Journal Upload Template Screenshot

- Click Macros.
- Select ImportLoadFile.
Journal Upload Template Screenshot
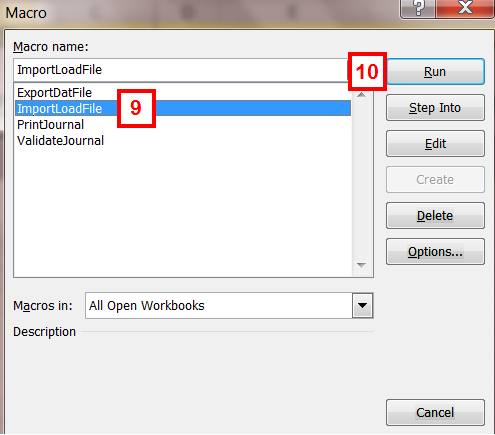
- Click Run.
- Navigate to and select the saved .txt file.
- Click Open.
- Using the Journal Entry Load Status report as a reference, correct the error(s) in the Journal header and/or line(s).
- Create the .dat file.
Note: Refer to the first tab of the Journal Upload Template if you need help.
- Repeat the steps in the Uploading the JE Data File section to upload the data file into M-Pathways.
Note: Refer to Create an Online Journal (JE) for information on attaching supporting documentation. If supporting documentation does not exist, go to Post Journal Entries (JEs).