Overview
The M-Pathways Purchasing Request Form enables staff responsible for procuring items to request the purchase of goods or services. Staff can request multiple items for a single vendor. The electronic form is then routed to staff who work centrally within a unit to verify the information and place the order in M-Pathways.
Request creators need to have the PR FORM PURCH USER role, which can be requested via OARS.
This document includes generic instructions for creating the ePro Purchasing Request. Check your unit’s business practice documentation for more details on how your unit uses this form.
Contents
Navigation
NavBar > Navigator > eProcurement > Purchasing Request Form
Create a Request
- Click Add a New Value.
- Enter a description of the request in the Subject field.
Note: The information in this field is searchable so include text that can be used to locate the request via search. - If applicable, select a value from the Priority drop-down list.
View Purchasing Request Form - Header Information Section Screenshot
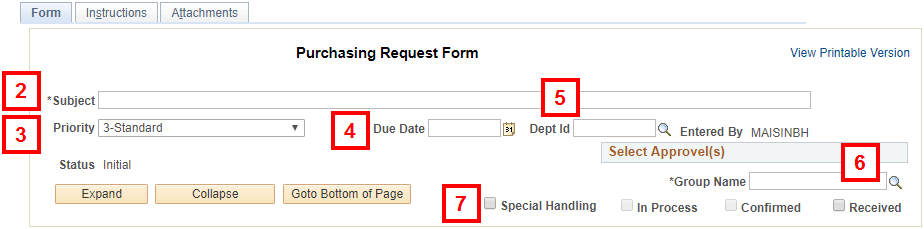
- If applicable, enter or select a Due Date.
- If your unit uses the Dept ID field for internal routing, enter or select the Dept ID.
- Enter or Lookup the approver Group Name
Notes:- Check your unit’s business practice information for recommendations on the applicable group to select.
- This is the group that your request will be routed to upon submission.
- Check the applicable boxes used by your unit to track workflow. See your unit’s business practice information for details.
Note: At any point after the request has been saved, click View Printable Version to print the current version of the form. - If applicable, enter or Lookup the Vendor ID.
View Purchasing Request Form - Supplier Information Section Screenshot
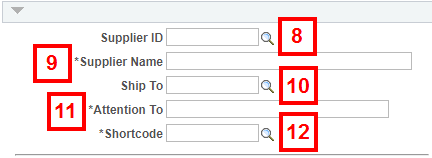
- Enter the Supplier Name.
- If applicable, enter or Lookup the Ship To code.
- Enter information in the Attention To field according to your unit’s business practice.
- Enter or Lookup the Shortcode
Note: To bill individual items to specific shortcodes, include the shortcode information in the item information. To split an item across multiple shortcodes, enter information in the More Information field. - Enter at least one set of item information, including at least
- Item Descr
- Quantity
- Unit Price
View Purchasing Request Form - Item Description Section Screenshot
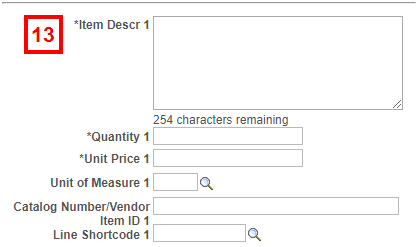
- If applicable, enter More Information.
- Click Save.
Notes:- Clicking Save does not submit the form.
- If the information entered contains errors, the applicable fields are highlighted. Correct the information and then click Save again.
- Click OK.
- The request now has a Seq # (sequence number). Use this number to check on the request as it progresses through the required approvers.
View Purchasing Request Form - Header Information Section (with Req #) Screenshot
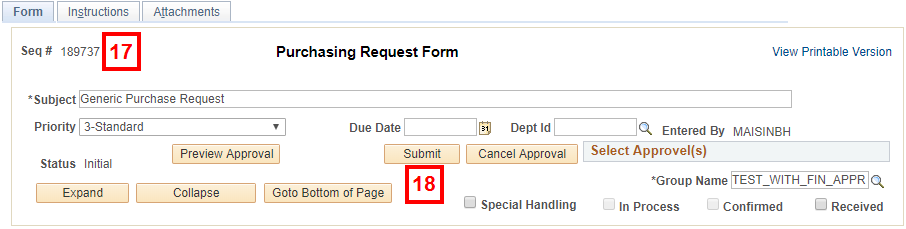
- Click Submit.
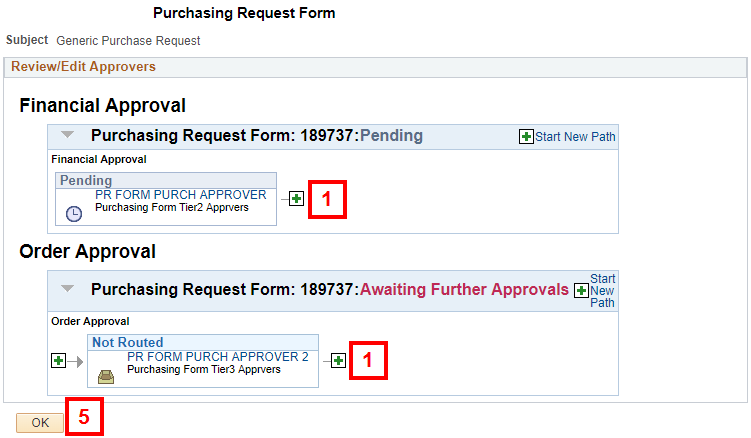
Review/Edit Approvers
- If you want to add an approver or reviewer, click Insert Approver
 .
.
Notes:- If the Approver Group you selected on the request form has opted to use a Financial Approver, you will see both Financial Approval and Order Approval flow diagrams. If not, you will only see an Order Approval flow diagram.
- Added approvers must have the role that maps to the group to which the request is routed. Additionally, they must have the role PR PURCH FORM APPROVER.
View Review/Edit Approvers Screenshot
- Enter or Lookup the User ID.
- To designate this person as a reviewer, click Reviewer.
Note: Reviewers receive an email that includes a link to the form so they can view it. They cannot approve or take any action on the form. - Click Insert.
- When the diagram includes all necessary approvers and reviewers, click OK. The status of the request moves from Initial to Pending and you can no longer make changes to the form.
- To cancel the request or to make changes after it has been submitted, click Cancel Request. The form moves to Cancelled status. You can then make changes and click Submit again.
Notes:- Requests that remain Cancelled appear in search results with a status of Cancelled.
- Requests that move to Approved status cannot be cancelled. Follow your unit’s business practice to cancel the order.
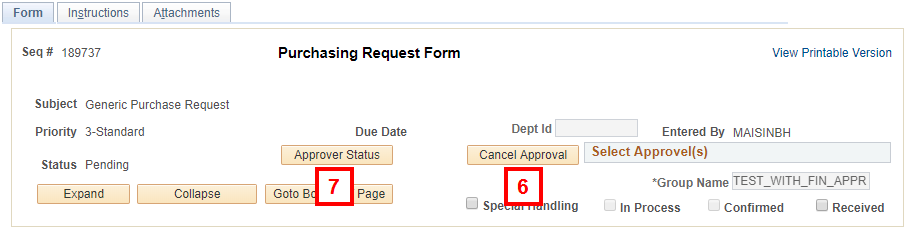
- To check on the status of this request as it progresses through routing, click Approver Status.
Note: The form creator receives an email when the request has been approved or denied. If the request is denied, a comment is required. The form creator can make any necessary changes and resubmit it. This button is available until the request has been approved by the final required approver.
Find an Existing Request
- Enter applicable search criteria.
View Find an Existing Value Page Screenshot
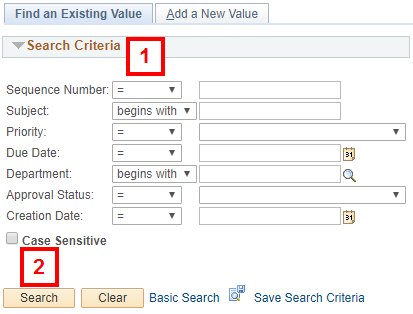
- Click Search.
- Click on the column header links to sort the list by the related value.
- Click any value in a row to go to the corresponding request.
- Check the information in the For Approver Use Only area.