Overview
PeoplePay ePro requisitions are used to pay non-U-M employees for services, etc. The five-step PeoplePay process shown below uses both the PeoplePay website and M-Pathways.
-
Complete PeoplePay Form
PeoplePay forms include:
- PeoplePay No Employment Relationship Cover Sheet
- Payment to Non-Employees for Service Form
-
Obtain a Supplier ID
Refer to Request a Supplier ID if the individual being paid doesn’t have a Supplier ID number.
The supplier's Status must be Active and Open for Ordering. If it isn’t, contact Supplier Maintenance by phone, (734) 764-8212, to update the Status.
Supplier Maintenance doesn’t accept e-mail requests for a Supplier ID/Status that contains Social Security Numbers.
-
Create PeoplePay ePro Req
You must submit your requisition (req) in order for it to progress through the system. If you only save the req, it will not be built into a PO and be eligible for payment. It also will not be electronically routed to Procurement Services if it meets the criteria for their handling.
Budget check
your req after you save and submit it. Budget checking ensures that a corresponding budget line exists for the ChartField combination(s) in the req and that the req is eligible to be built into a PO. -
Run the Req/PO Status Report
Refer to eProcurement Reports (for Windows) for more information.
-
Submit Paperwork
Route the PeoplePay forms and M-Pathways Req/PO Status report to Procurement Services:
- PeoplePay Procurement Services
5091 Wolverine Tower, 1287
The paperwork is imaged in Procurement Services. To facilitate the imaging process, do not staple the paperwork; use a paperclip. Do not write on the back of the paperwork.
- PeoplePay Procurement Services
Navigation
Homepage: Purchasing and Payments; Tile: Create Requisition
Create a PeoplePay ePro Req
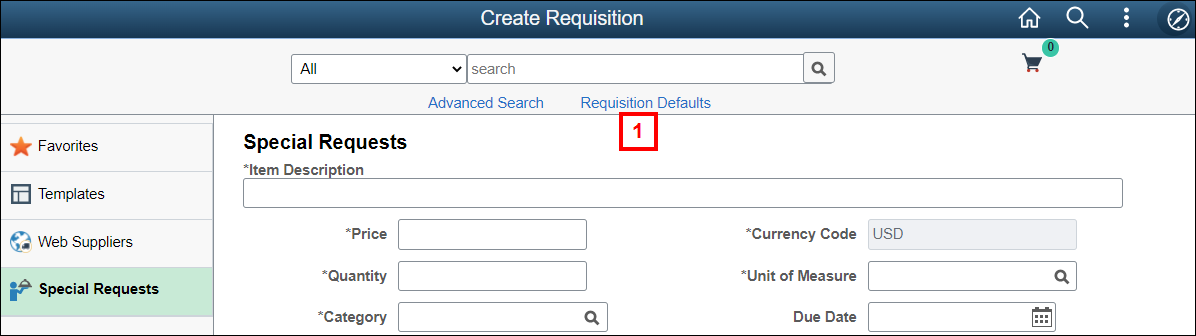
- Click Requisition Defaults.
Create Requisition Page Screenshot
- Enter or Lookup the Supplier ID.
Requisition Defaults Page Screenshot
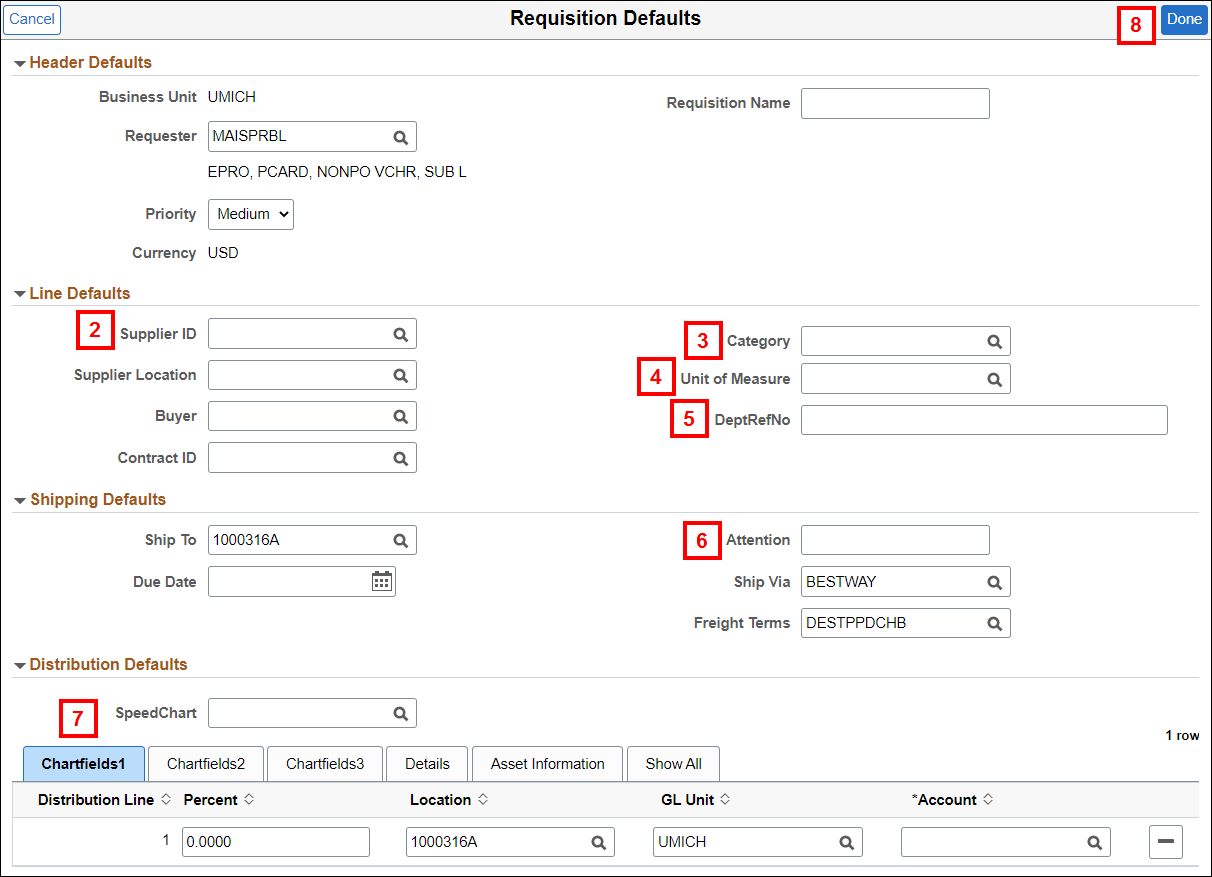
- Enter PPLPY in the Category field.
- Enter EA in the Unit of Measure field.
- If the supplier has submitted an invoice to you, enter the invoice number in the DeptRefNo field.
- Enter the complete name and phone number, including area code, of the contact person for this req in the Attention field.
- Verify, enter, or Lookup the SpeedChart or ChartField combination for the req.
Notes: - The SpeedChart is the same as a ShortCode.
- Do not enter an Account value. It defaults from the Category entered on each req line.
- Click Done.
- Enter an Item Description.
Create Requisition Page Screenshot
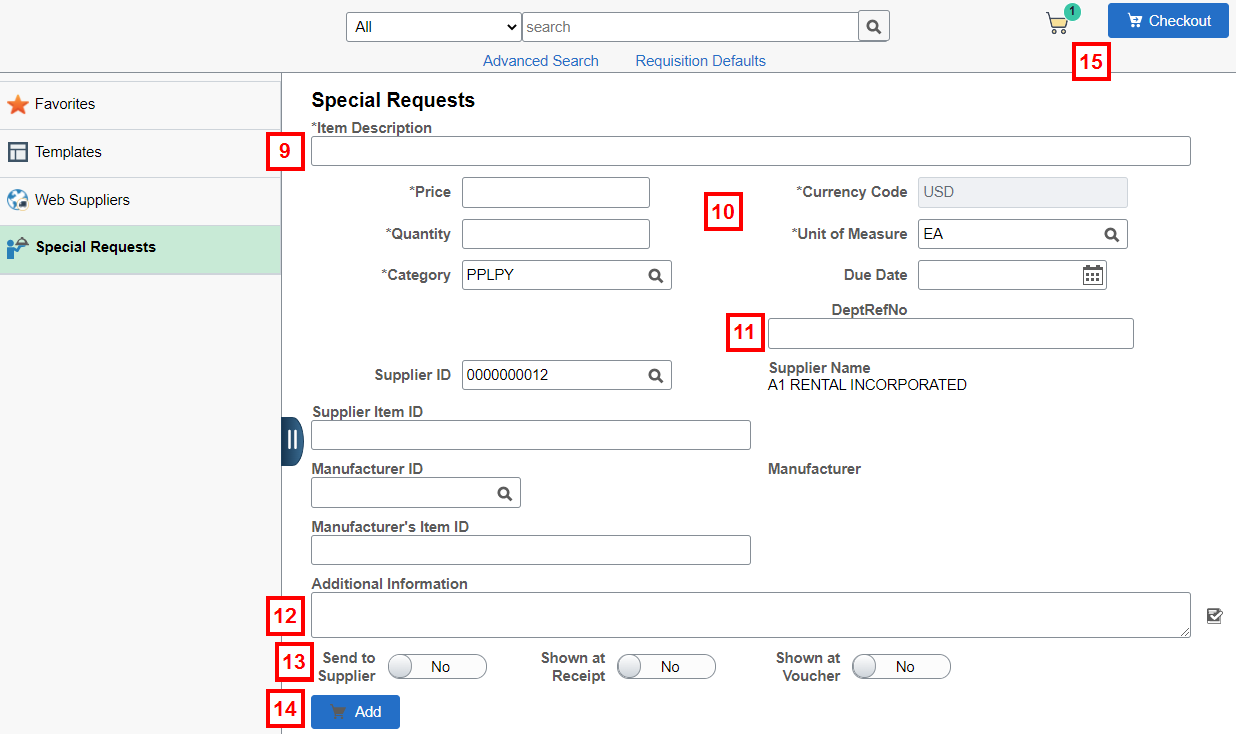
- Enter or select applicable values for the following fields for the req line:
- Price (i.e., unit price)
- Quantity
- Unit of Measure (UOM)
- Category
- If applicable, enter a departmental reference number in the DeptRefNo field for the line.
- If applicable, enter a comment for the line in the Additional Information field.
- Select where the comment applies:
- Send to Supplier displays on the PO that goes to the supplier.
- Shown at Receipt displays at time of receiving and on saved receipt.
- Shown at Voucher provides payment information to Accounts Payable.
- Click Add.
Note: Repeat steps 9-14 for additional items. - Click the Shopping Cart
 to review the items and if applicable, update the Quantity and Unit of Measure,
OR
Click Checkout to go directly to the Checkout page.
Notes:- If applicable, you can add more items by clicking Continue Shopping.
- In this procedure, you will go to the Checkout page.
Complete steps 16-27 to add attachments and comments to the entire req. Otherwise, go to step 28.
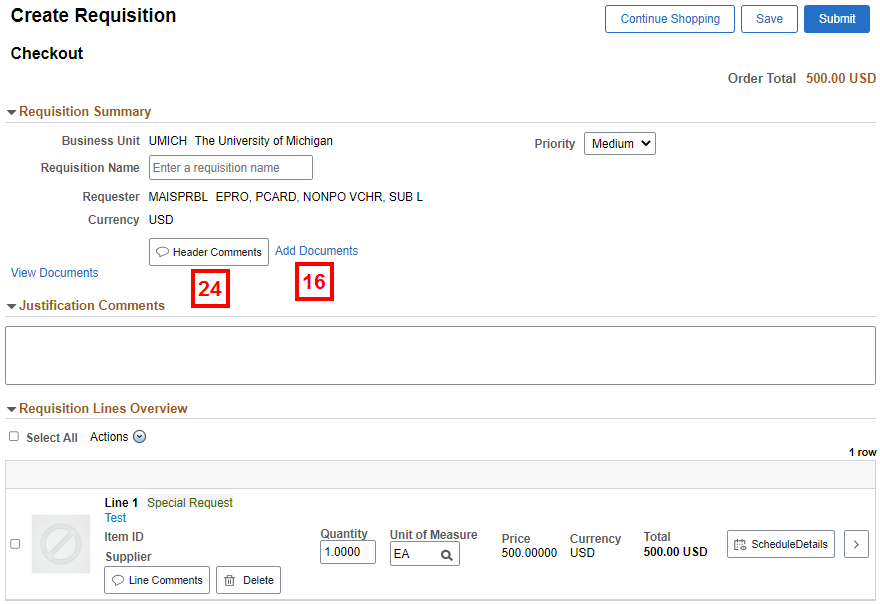
- Click Add Documents.
- Click Add Attachment.
- Click My Device.
- Navigate to and Open the file.
Note: Only .pdf and .tif files are accepted. - Click Upload.
- Once the upload is complete, click Done.
- Click View to verify the document uploaded.
Note: Repeat steps 16-21 to attach additional files. - Click Done.
- If applicable, click Header Comments to add comments to the entire req.
- Enter Comment Text to notify Procurement Services that an attachment is included in the requisition.
Note: Comments are required if you include an attachment.Requisition Header Comments Page Screenshot
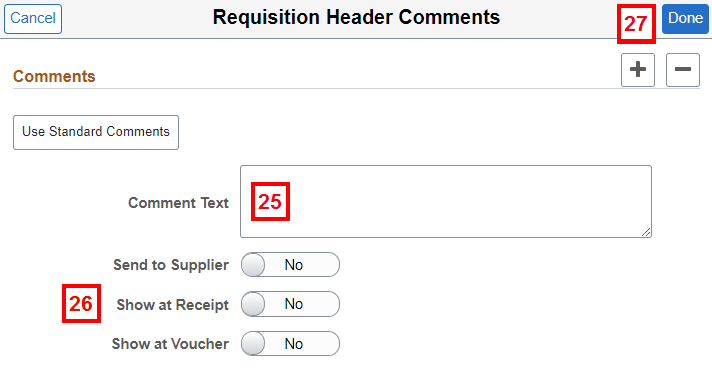
- Select where the comment applies:
- Send to Supplier displays on the PO that goes to the supplier.
- Show at Receipt displays at time of receiving and on saved receipt.
- Show at Voucher provides payment information to Accounts Payable.
- Click Done.
- If applicable, enter Justification Comments to provide approvers with reasons to approve the req.
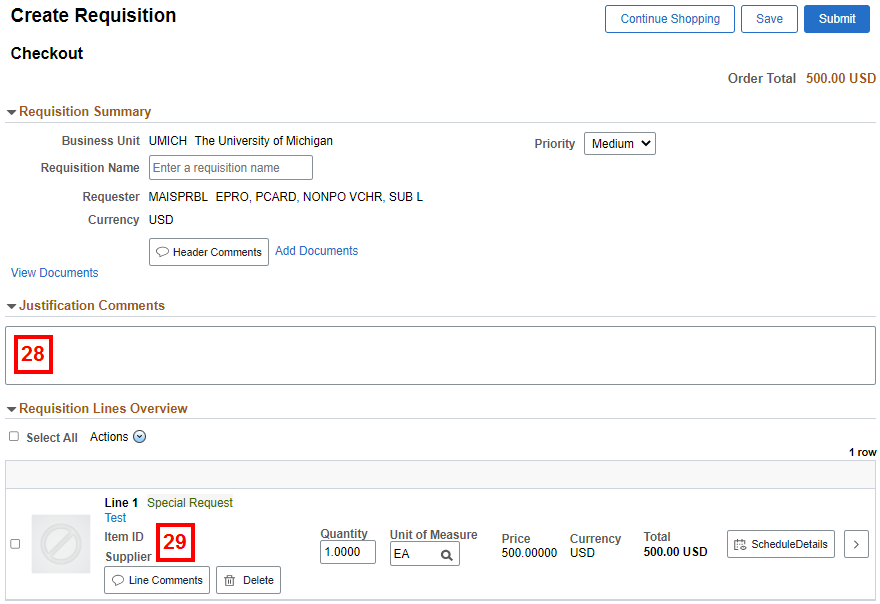
Complete steps 29-32 to add comments to an individual req line. Otherwise, go to step 33.
- Click Line Comments on the req line.
- Enter the Comment Text.
Requisition Line Comments Page Screenshot
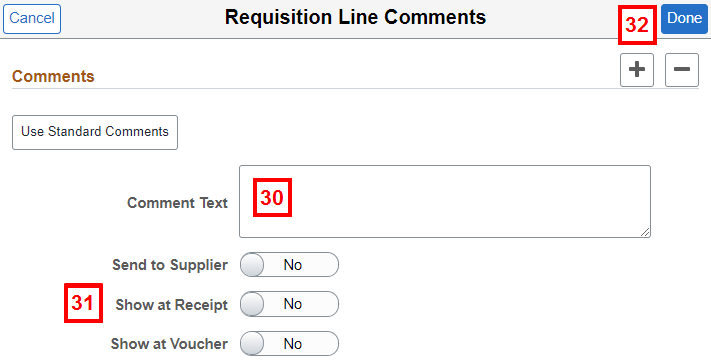
- Select where the comment applies:
- Send to Supplier displays on the PO that goes to the supplier.
- Show at Receipt displays at time of receiving and on saved receipt.
- Show at Voucher provides payment information to Accounts Payable.
- Click Done.
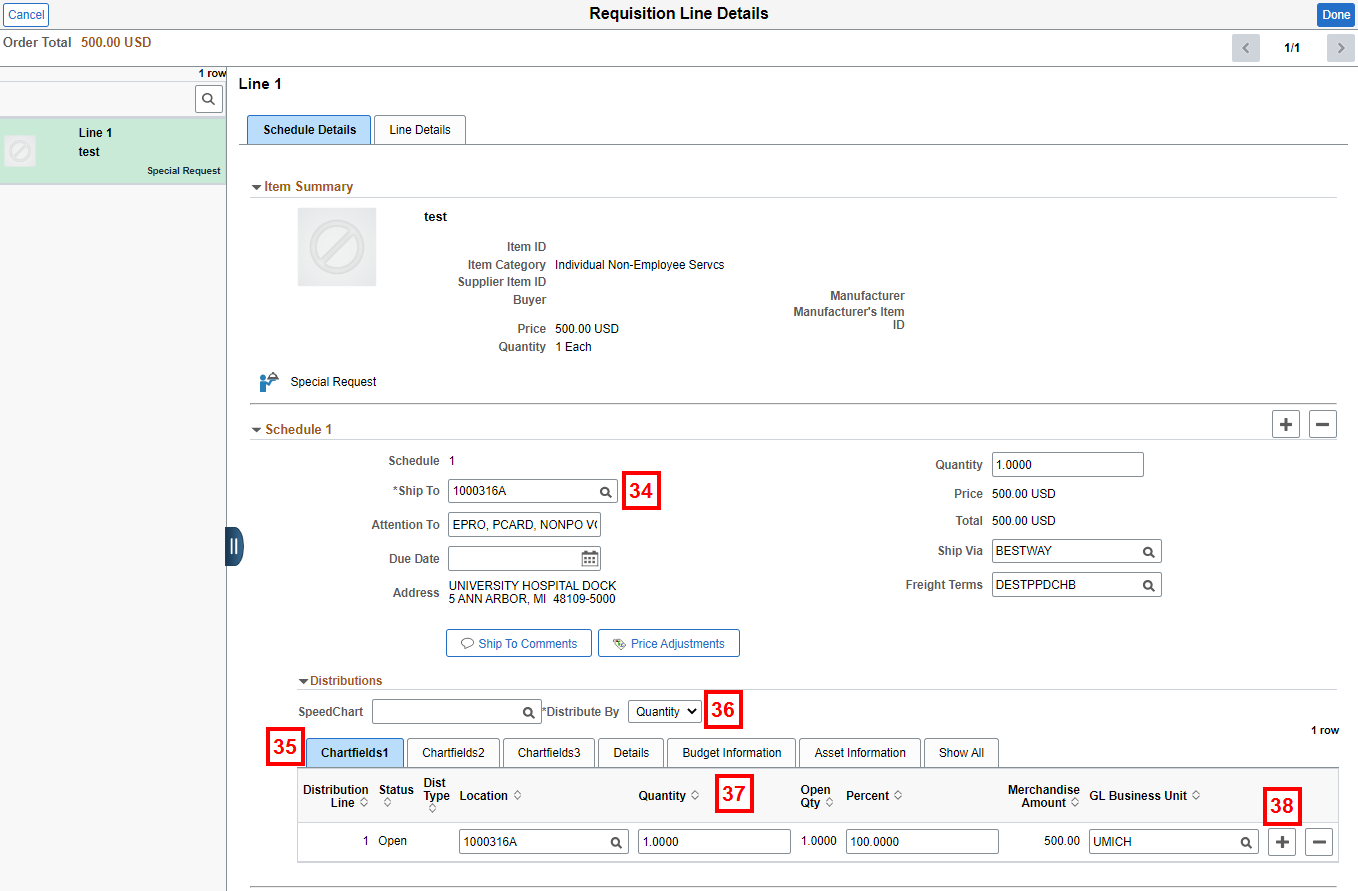
- Click Schedule Details on the req line to view the shipping and ChartField information.
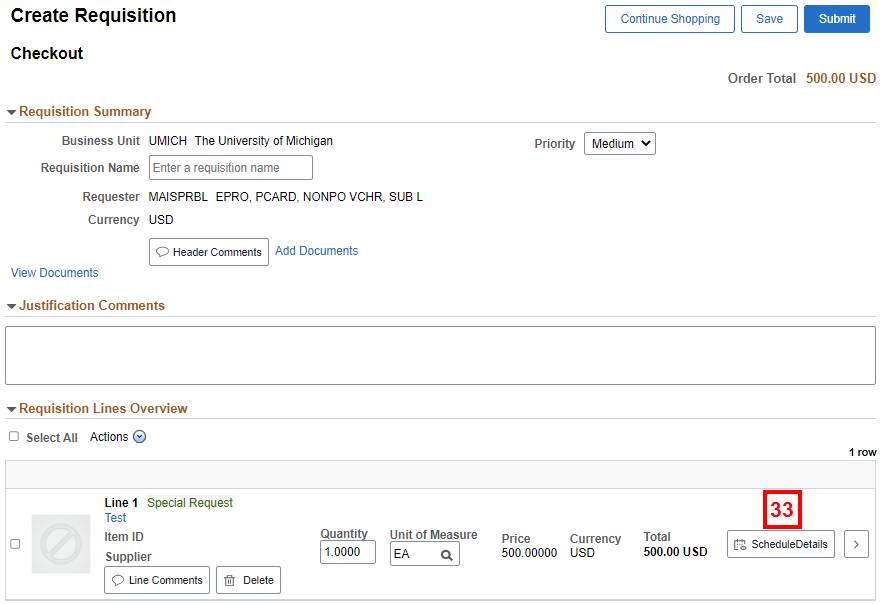
- Verify, enter, or Lookup the Ship To code for the individual req line.
Requisition Line Details Page Screenshot
To split the distribution for an individual req line among multiple ChartField combinations by the quantity of the item ordered or by dollar amount, complete steps 35-44. Otherwise go to step 45.
To split the distribution of multiple req lines by percent, refer to Split ChartField Distributions for an ePro Req using Mass Change.
- Verify the ChartFields1 tab is selected or click it.
- Select Quantity or Amount from the Distribute By drop-down list.
- Based on the value selected in step 36, change the Quantity, Percent, or Merchandise Amount field to the value you want to distribute to the first ChartField combination.
Note: Changing the Quantity, Percent, or Merchandise Amount prior to adding the row allows the M-Pathways system to automatically calculate the values for the subsequent distribution(s). - Click Add Row
 to insert an additional ChartField distribution row for the req line.
 - Click the ChartFields2 tab.
Requisition Line Details Page Screenshot
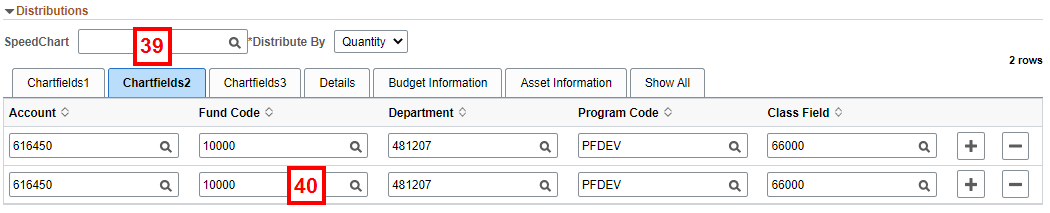
- Enter or Lookup ChartField values for the new distribution row.
- Repeat for steps 35-40 for additional distribution rows.
- If applicable, click the ChartFields3 tab to enter Project/Grant information. Otherwise, go to step 45.
Requisition Line Details Page Screenshot
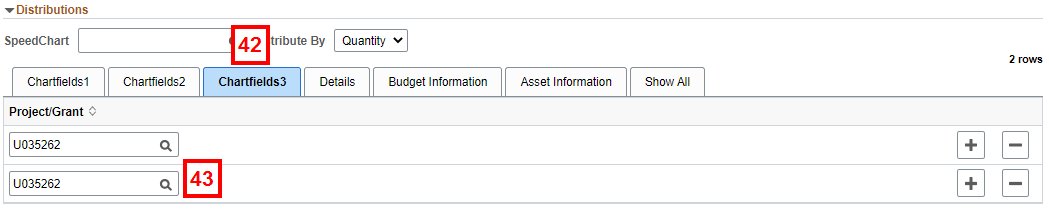
- Enter or Lookup the Project/Grant for applicable lines.
- Repeat steps 34-43 for additional req lines.
- Click Done.
- If applicable, override the Supplier's default dispatch method or Payment Terms for the req. Refer to Select an Alternate Dispatch Method or Payment Terms for a Purchase Order for more information.
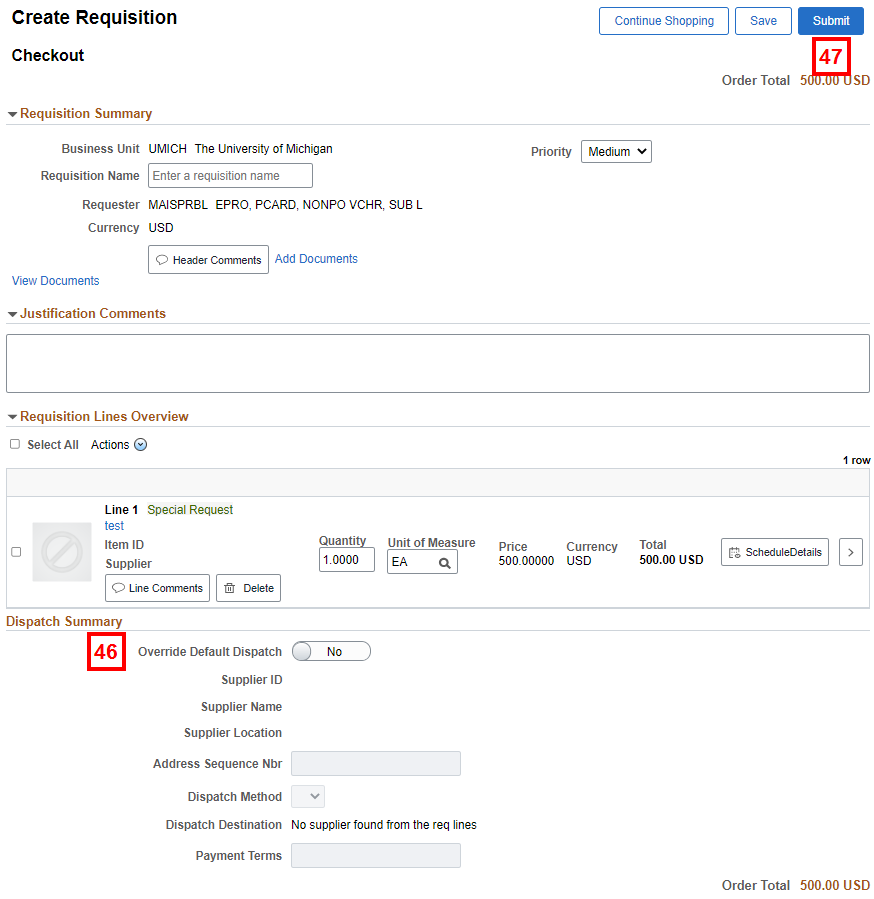
- Click Submit.
- Verify the Status.
Notes:- Reqs under $10,000 entered with a supplier ID and without a buyer, display an Approved status.
- Reqs requiring approval display a Pending status.
- Refer to ePro Special Request and M-marketsite Requisition Approvals and Routing for more information.
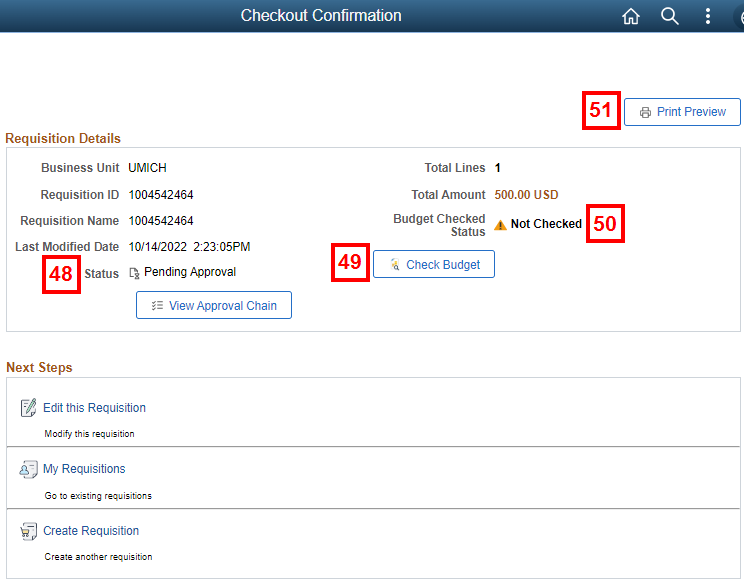
- Click Check Budget.
- Review the Budget Status:
- Valid = budget line exists
Note: The Check Budget button no longer displays. - Error = no budget line exists (or other error)
Note: Refer to Resolve Budget Check Errors for eProcurement Transactions for more information.
- Valid = budget line exists
- If applicable, click Print Preview to display a printable version of the requisition in a separate browser window.
- Run the Req/PO Status Report and submit paperwork as described in the Overview section of this document.