Overview
This document provides the steps for entering a Payment Request in M-Pathways.
Important Information
- Attaching supporting documentation is required for creating a Payment Request. Before beginning, scan and save all documents needed for the transaction.
- Only PDF (.pdf) and TIF (.tif) files can be added as supporting documentation. File names cannot be longer than 65 characters. Each attachment has a size limitation of 10MB.
- Once a Payment Request is created and saved, it will be subjected to the nightly batch process and automatically submitted for approval workflow.
Contents
- Create a Payment Request
- Additional Information
- Travel or Hosting with an Advance or Reimbursement Check
- Select an Alternate Remit Address/Verify a Supplier Address
- Enter a Comment
- View Audit Logs for an Existing Voucher from the Voucher Summary Page
- Audit Log Search
- View Voucher Document Status for an Existing Voucher from the Voucher Summary Page
- Related Documents Tab
- Additional Resources
Navigation
NavBar > Navigator > Accounts Payable > Payment Request
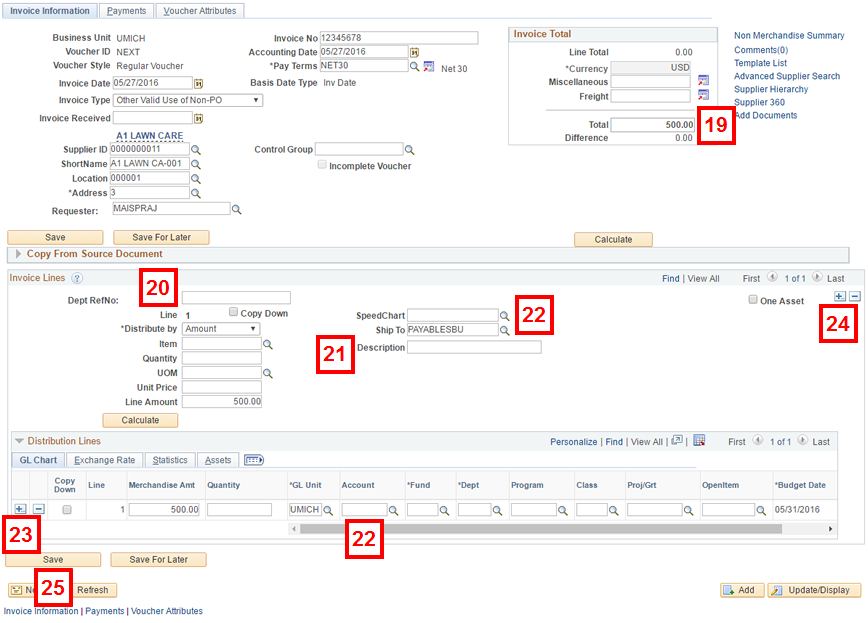
Create a Payment Request
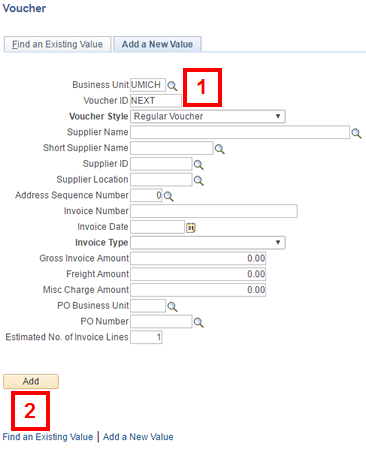
- Verify that the following information defaults on the Add a New Value page:
- UMICH in the Business Unit field
- NEXT in the Voucher ID field
- Regular Voucher in the Voucher Style field
- Click Add.
- Enter the Invoice No.
- If the supporting documentation includes an invoice date, enter it in the Invoice Date field. Otherwise, enter or select today’s date.
- Select the Invoice Type from the drop-down list that best identifies the purpose of the Payment Request.
- Enter or Lookup
 the Supplier ID and go to step 11.
OR
Click Related Content > Supplier Search to open the Review Suppliers pagelet at the bottom of the page. This method provides more information on suppliers than a standard lookup. See Locate a Supplier for more information. The supplier will not populate in the Payment Request, you must copy/paste it. After you are done searching, close the Related Content pagelet by clicking and go to step 11.
OR
Click Advanced Supplier Search to search for the supplier and go to step 7. - Enter the entire or partial supplier Name.
- Enter other relevant search criteria (e.g., City) if applicable.
- Click Search.
- Click Select Supplier
 for the desired supplier to enter the information on the Invoice Information page.
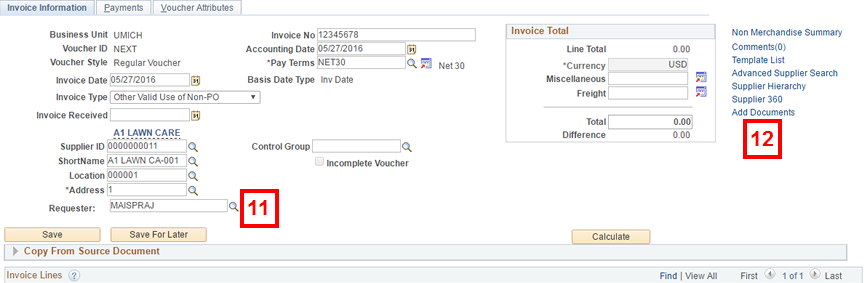
 - Enter or Lookup the Requester.
- To add supporting documents to the payment request, click Add Documents.
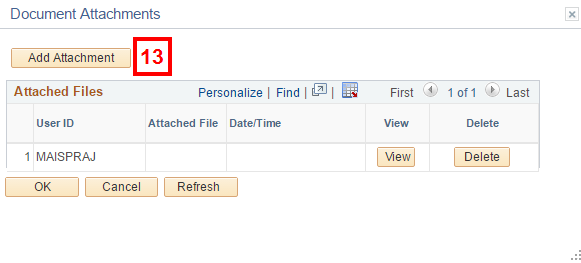
- Click Add Attachment.
- Click Choose File.
- Navigate to select the applicable file (not shown).
- Click Upload.
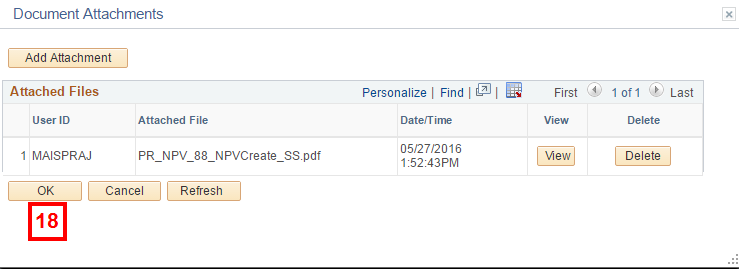
- Repeat steps 12–16 until all supporting documents have been attached to the Payment Request.
- Click OK.
- Enter the gross amount in the Total field.
- If applicable, enter a department reference number for the transaction in the DeptRefNo field.
- Enter the item or line description in the Description field.
- For Travel or Hosting Advance Line Items: Enter TA#, the Travel Advance number, and the traveler/host’s last name in the Description field.
- For Reimbursement Check Line Items: Enter Ck#, the check number, and the traveler/host’s last name in the Description field for this line.
- Refer to the Travel or Hosting with an Advance or Reimbursement Check section in this document for more information.
- Enter a ShortCode value in the SpeedChart field and the Account value in the Account field.
OR
Enter the Account value in the Account field and enter applicable values in the Fund, Department, Program, Class and Proj/Grt fields, as needed. - When you enter the SpeedChart value the line amount becomes the number in Total. When you add a second line, you need to split money manually.
- The Line Amount value for an added line defaults to the Total amount minus (-) the sum of the Line Amounts for the previous Invoice Lines. Adjust as necessary.
- The DeptRefNo and the ChartField combination from the original line is the default for the new line. Adjust as necessary.
- Complete this step only if you are splitting ChartField distributions: Click Add multiple new rows...
 in the Distribution Lines group box.
 - The Invoice Lines group box contains two Add multiple new rows... buttons. One adds an invoice line and the other adds a ChartField distribution. Confirm that you are clicking the appropriate button to add a distribution line.
- Check the Copy Down box on an existing distribution line to copy all ChartFields to the new row(s).
- Enter the number of rows to add.
- Click OK.
- Enter or update applicable fields for all distribution lines.
- Complete this step only if you are creating a Multi-line Payment Request: Click Add multiple new rows... in the Invoice Lines group box.
- Enter the number of rows to add.
- Click OK.
- Enter or update applicable fields for the new invoice line(s).
- If applicable, update the Line Amount for invoice line 1.
Note: Verify that the sum of all Line Amounts equals the Total.
- Click Save or Save for Later.
- By clicking Save, the Payment Request will be picked up and routed for approval in a nightly batch process. You will not be able to return and complete it at a later date.
- By clicking Save for Later the Payment Request is placed on hold (Incomplete status) until you return and click Save at a later time. Incomplete vouchers that are 90 or more days outstanding will be deleted.
- If you have not attached supporting documents to the Payment Request, a reminder dialog box displays.
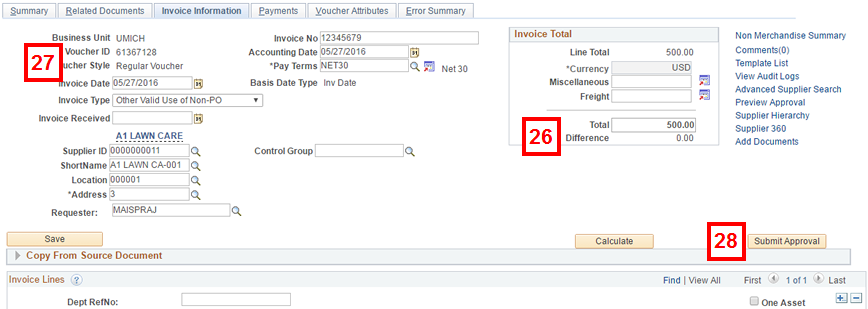
- Verify that the Difference value is 0.00.
- If applicable, record the system-generated Voucher ID for your records.
- Click Submit Approval.
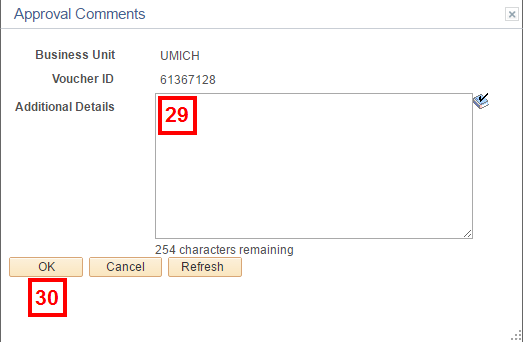
- Enter applicable comments in the Additional Details field.
- Click OK.
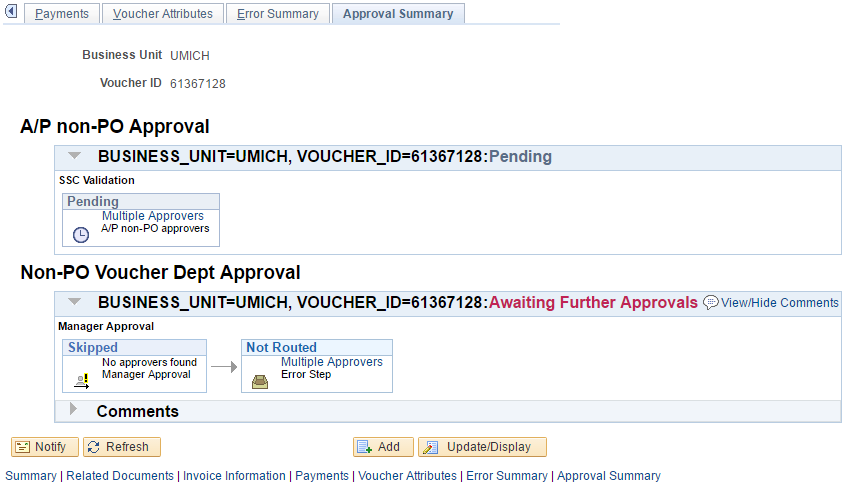
- Review the Approval Summary details.
Do not enter any data on the Add a New Value page. System errors may result when saving the transaction.
Add a New Value Page Screenshot
Invoice Information Page Screenshot
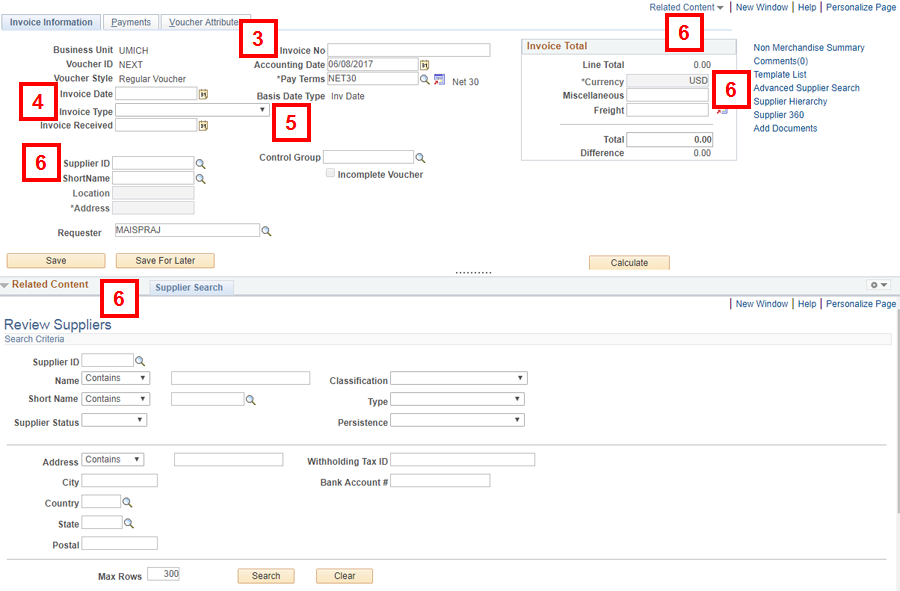
Note: Payment Requests should be for payment not related to goods/services.
Note: The Payment Request’s Invoice Type determines the format for the Invoice No. Refer to Invoice Numbering Standards for more information.
Note: It is a best practice to verify an external supplier's remit address. You can do this using the Supplier Database prior to creating the Payment Request. If the desired address isn’t available, contact Supplier Maintenance to have it added to the database.
Supplier Lookup Page Screenshot
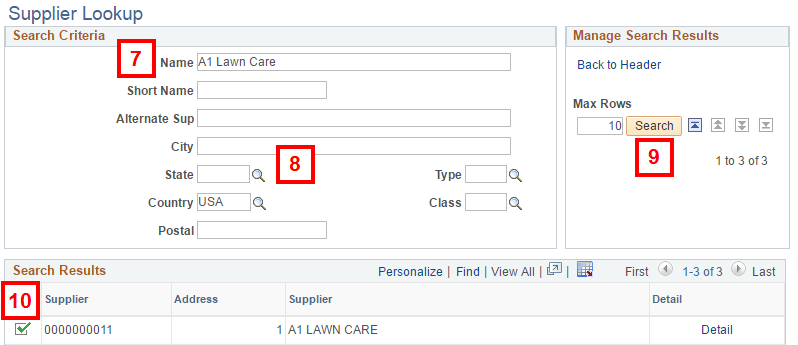
Note: All searches are based on a condition of contains.
Wildcards (%) are not needed to search.
Note: This field defaults based upon the person entering the Payment Request. It can be changed to another uniqname. If the Shared Services Center (SSC) enters the Payment Request, the person in the Requester field receives an e-mail when the Payment Request is saved.
Invoice Information Page Screenshot
Document Attachments Window Screenshot
File Attachment Window Screenshot
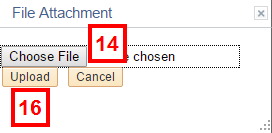
Note: Only PDF (.pdf) and TIF (.tif) files can be added as supporting documentation. File names cannot be longer than 65 characters.
Document Attachments Window Screenshot
Note: If you are paying a foreign supplier, convert the payment amount to USD (US dollars) and include the conversion worksheet as supporting documentation.
Invoive Information Page Screenshot
Note: This is an optional, free-form text field.
Notes:
Note: The Line Amount value for a Reimbursement check is a positive dollar amount.
Note: The Line Amount value for a Travel Advance is a negative dollar amount (this should default correctly based upon the entry of all other Expense and Reimbursement check lines).
Notes:
Notes:
Note: The Invoice Lines group box contains two Add multiple new rows... buttons. One adds an invoice line and the other adds a ChartField distribution. Confirm that you are clicking the appropriate button to add an invoice line.
Note: ChartFields (minus Account) copy down from the previously selected invoice line.
Notes:
Note: If it is not, adjust the line amounts for each distribution line so they equal the amount in Total. Use the Calculate button if appropriate.
Invoive Information Page Screenshot
Note: Clicking Submit Approval immediately alerts Accounts Payable that your Payment Request paperwork is being sent. If approved, the request will then be routed to the Department Manager for approval.
Note: For example, enclose subscription form with check or enclose registration form with check.
Approval Comments Window Screenshot
Approval Summary Page Screenshot
Additional Information
The following steps are dependent on the reason for the Payment Request and do not always need to be completed. If applicable, click Show previous tabs  to expand the menu tab to select the appropriate one for the task.
Travel or Hosting with an Advance or Reimbursement Check
For employees, travel advances and expenses are recorded in Concur. You may create a Payment Request to record or reimburse student or guest (non-UM employees) travel advances or expenses.
When creating Payment Requests for Travel or Hosting with an Advance or Reimbursement Check, keep the following in mind:
- Which lines have positive and negative dollar values in the Line Amount field:
- Expense and Reimbursement Check lines are entered as positive values (e.g., 100).
- The Advance line is entered as a negative value (e.g., -100).
- ChartField combinations:
- Expense lines use the appropriate ChartField combination(s) for your unit.
- Advance and Reimbursement Check lines use one of the following specific ChartField combinations:
- If the expense line(s) uses a Fund value of 20000 or 25000, use:
- GL Unit = UMICH
- Account = 122400
- Fund = 99500
- Department = 000500
- Program = 90070
- No Class or Project/Grant
- If the expense line(s) uses a Fund value of 10000 or 30000-5xxxx, or if you want to charge the advance and reimbursement line(s) to your unit (instead of centrally), use:
- GL Unit = UMICH
- Account = 122400
- Fund = Fund value other than 20000 or 25000 (e.g.,10000, 30000, 40000, or 5xxxx)
- Department = Your department’s DeptID
- No Class, Program or Project/Grant
- Both the Reimbursement Check and Advance line must use the same ChartField combination.
Select an Alternate Remit Address/Verify a Supplier Address
- Click the Payments tab.
- Verify the remit to Address or click Lookup to search for the applicable address.
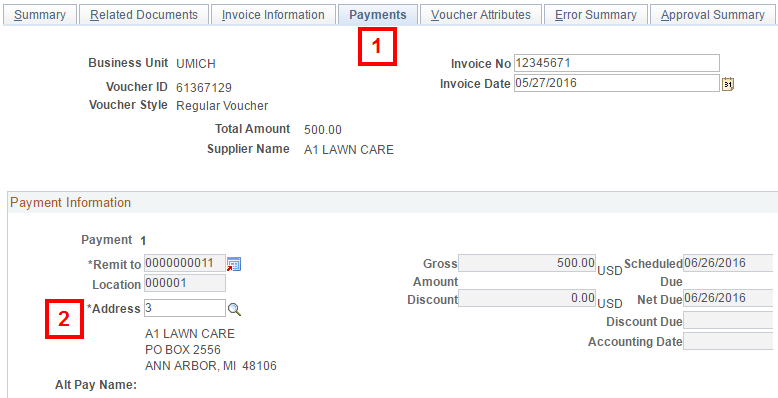
Note: It is a best practice to verify the supplier’s address. If the desired address for an external supplier is not available, contact Supplier Maintenance to have the address added to the Supplier Database.
Enter a Comment
Comments are viewable by Accounts Payable.
- Click the Invoice Information tab.
- Click Comments to enter Payment Request comments.
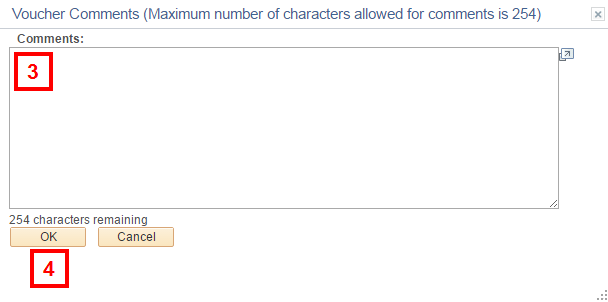
- Enter Payment Request Comments.
- Click OK to return to the Invoice Information page.
Invoice Information Page Screenshot
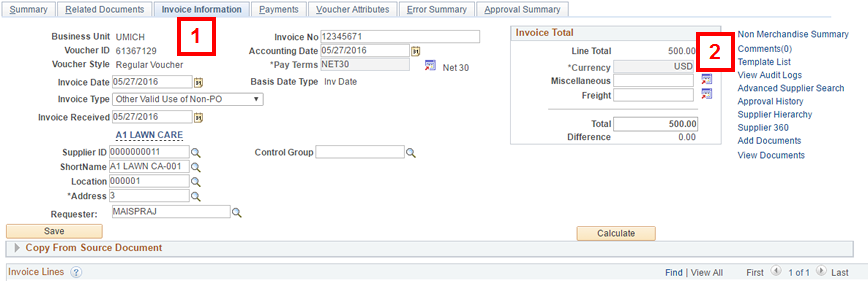
Note: Appropriate comments include instructions to Accounts Payable for processing the Payment Request.
Voucher Comments Window Screenshot
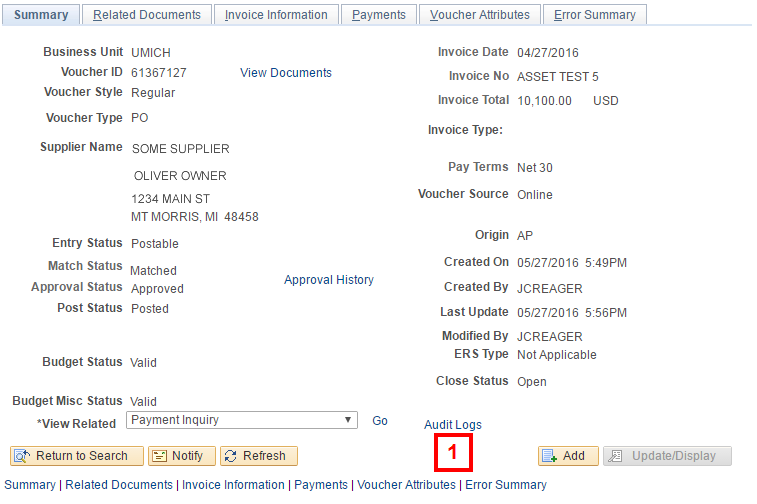
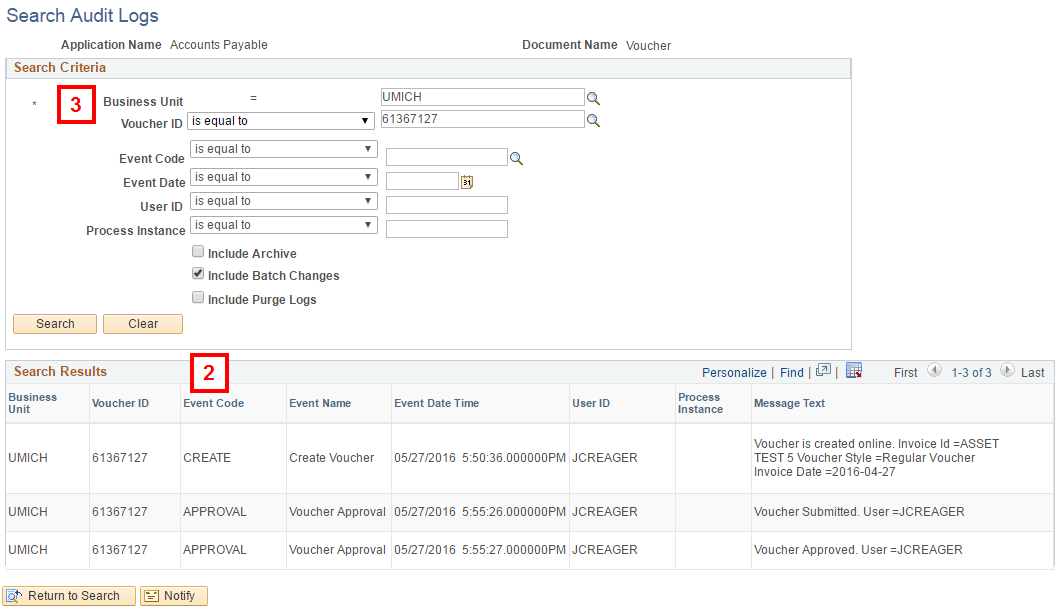
View Audit Logs for an Existing Voucher from the Voucher Summary Page
- Click Audit Logs.
- Review the events associated with the voucher.
- If applicable, conduct additional audit log searches.
Voucher Summary Tab Screenshot
Search Audit Logs Page Screenshot
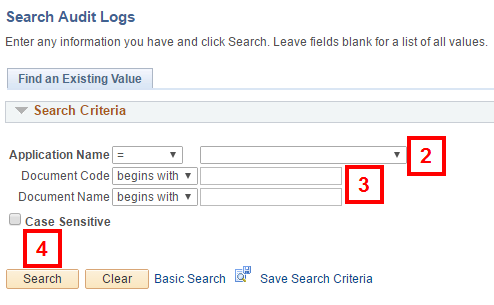
Audit Log Search
- Navigate to: NavBar > Navigator > Set Up Financials/Supply Chain > Common Definitions > Audit Logging > Search Audit Logs
- Select Accounts Payable from the Application Name drop-down list.
- Enter VOUCHER in the Document Code field.
- Click Search.
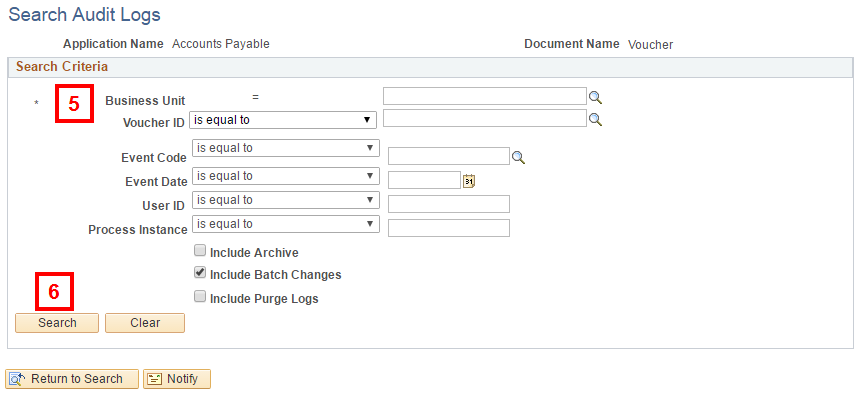
- Enter applicable search criteria.
- Click Search.
Search Audit Logs Page Screenshot
Search Audit Logs Page Screenshot
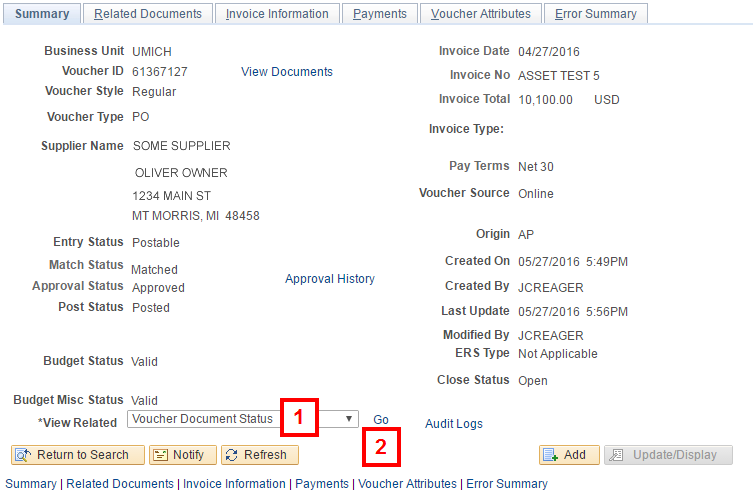
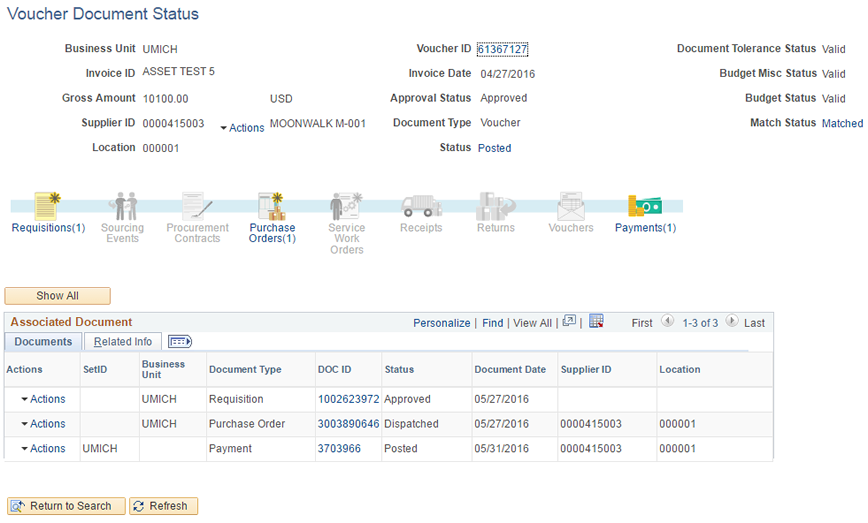
View Voucher Document Status for an Existing Voucher from the Voucher Summary Page
- Select Voucher Document Status from the View Related drop-down list.
- Click Go.
- Review Voucher Document Status.
Voucher Summary Page Screenshot
Voucher Document Status Page Screenshot
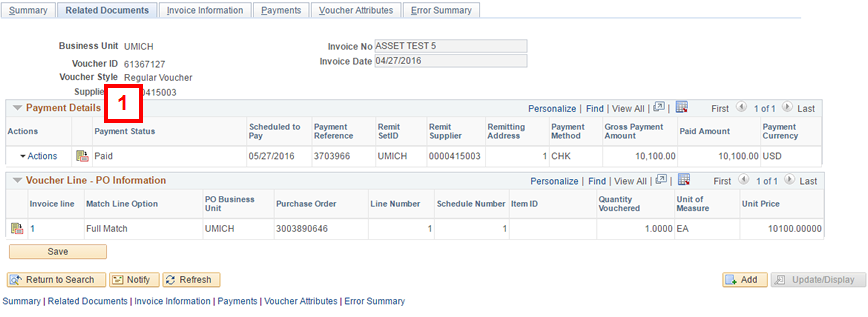
Related Documents Tab
- Review the Payment Details group box for Payment Status and other payment information.
Related Documents Tab Screenshot