Important Information
If you are in the Survey Data page, you can access the Organized Research Activity (ORA) page by clicking the Organized Research Activity link or page tab. You do not need to leave the Survey page group and navigate through the menu.
If a room meets the Organized Research Activity (ORA) page requirement, all ORA room data must be reviewed and verified during the survey period. Make corrections or changes as needed and then:
- Check the ORA Verify Complete box.
- Click Save on the Organized Research Activity page. The status in the Survey Action field on the ORA and Survey Data pages are automatically updated to To Authorizer.
Click Include History on the ORA page if you want to see a record of past data from this and prior survey periods.
Navigation
There are two Survey search page options:
- NavBar > Navigator > Space Management > Survey > Survey/ORA/Utilization/Feature
- Use this option to include Room Utilization fields in both the search and search results.
- NavBar > Navigator > Space Management > Survey > Survey/ORA
- Use this option to exclude Room Utilization fields in both the search and search results. This prevents multiple rows for the same room from being returned in the search results.
Both options display the same data on the survey page tabs.
Step-by-Step Process
- Enter search criteria in one or more of the following fields:
- Building
- Floor
- Room Number
- Department
- Room Type
- Survey Action
- Click Search.
- If the data you entered in step 1 is unique to a single room, the Survey Data page for that room displays.
- If the data you entered applies to more than one room, a list limited by the data displays. Click the desired selection.
- Click the Organized Research Activity tab in order to make your ORA changes.
- Enter a new Project Grant code as needed in the Proj/Grt field.
OR
If adding a new Project Grant code for the same room, click Add row . Enter the new Project Grant code in the new field.
OR
Delete a Project Grant by clicking Delete row on the unwanted Project/Grant row.
 - Verify that the data is accurate.
- Check the ORA Verify Complete box.
- Click Save.
- Verify the Survey Action changes from None to To Authorizer after you save your changes.
Note: You can enter the room Record Number, if known.
Notes:
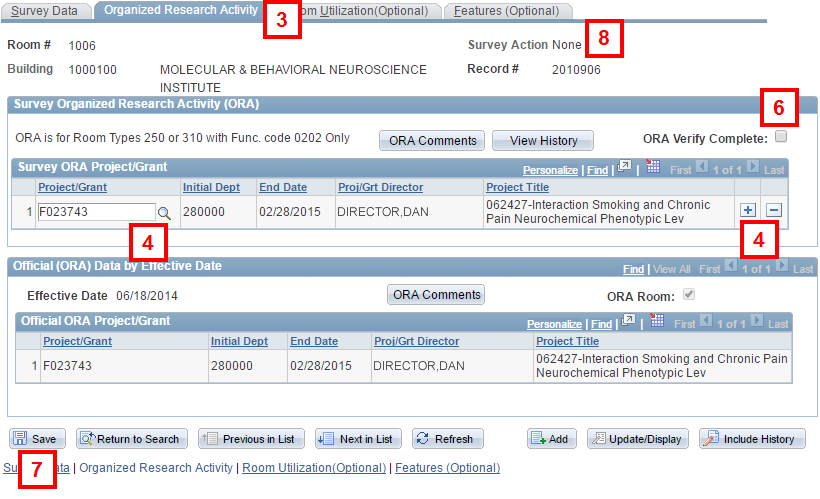
Organized Research Activity Tab Screenshot