Important Information
- If you are the Controller and are reassigning the Authorizer and Submitter roles, add a new effective dated row and enter the uniqname of the new Submitter and Authorizer. Verify this information at the beginning of the Survey period or at any time during the year when appropriate.
- For all other roles, when you access this panel, the fields in the Survey group box are grayed, indicating that you can view this information, but you cannot change it.
- All users who have access to the appropriate Dept ID can change the data in the Contacts group box. Verify and update this information at the beginning of the Survey period.
Navigation
NavBar > Navigator > Space Management > Survey > Space Departments
Step-by-Step Process
- Enter or Lookup
 the Department ID.
 - Click Search.
- If applicable, click the department link in the search results.
- Verify the Contacts and make changes if necessary by clicking the Add Row button to add a new effective-dated row.
- The Survey Contact field is required for all departments. This field should contain the uniqname of the individual with the most knowledge about your department’s space. If this field is blank, you will not be able to authorize and submit your space survey.
- The ORA Contact field is required for all departments that have rooms that meet the Organized Research Activity (ORA) requirements. This field should contain the uniqname of the individual with the most knowledge about your department’s Project/Grant information, supporting the organized research taking place in your department. If your department has rooms meeting the ORA requirement, but this field is blank, you will not be able to authorize and submit your space survey.
- Verify the Controller, Submitter, and Authorizer.
- If applicable, click Add Row
 to add a new effective dated row. The current date defaults.
 - Enter the applicable uniqname in the Submitter and/or Authorizer fields.
- Click Save.
Note: Leave the field blank to display a list of all Dept IDs to which you have access.
Notes:
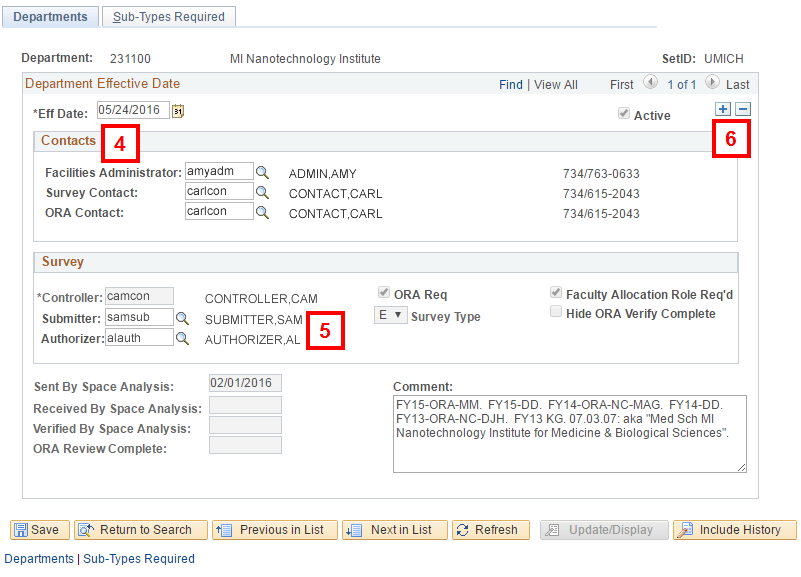
Space Departments Page Screenshot
Note: If you are the Controller, you can change the Submitter and Authorizer as well as the uniqname for contacts in the Contacts field. Complete steps 6 – 8 to change data.
Note: You may need to scroll down to display Save.