Overview
The Scheduled Hours Report is used to review employees’ assigned schedules in M-Pathways. It displays each employee’s scheduled hours per day for a seven day period, including the start and end times of time-based schedules used by select departments.
Navigation
NavBar > Navigator > Time and Labor > Reports > Scheduled Hours
Step-by-Step Process
- Click Search to display your existing Run Control ID(s).
- If applicable, select a Run Control ID from the Search Results list and skip to step 6.
Add a Run Control ID
- If a Run Control ID does not display, click the Add a New Value tab or link.
- Enter a name for the new Run Control ID.
Note: You can use letters, numbers, and underscores to name a Run Control ID, but you cannot use spaces, dashes, or other non-alphanumberic characters. - Click Add.
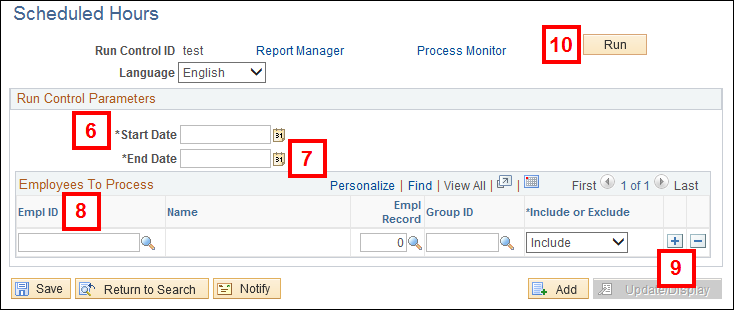
Enter Report Parameters
- Enter the start date of the seven day period for which you need to review the schedule assignment(s) in the Start Date field.
Note: A Sunday typically is entered as the start date. - Enter the end date of the seven day period for which you need to review the schedule assignment(s) in the End Date field.
- Complete the appropriate fields in the Employees To Process section to indicate which employees will be returned in the report:
- To retrieve schedules for all employees within a specific static group, enter the static group in the Group ID field.
- To include or exclude individual employees:
- enter the employee’s EmplID in the EmplID field and Employee Record Number in the Empl Rcd # field,
and - select Include or Exclude from the Include or Exclude drop-down list.
- enter the employee’s EmplID in the EmplID field and Employee Record Number in the Empl Rcd # field,
- If applicable, click Add Row
 and repeat step 7 for each additional static group and/or EmplID.
 - Click Run to proceed to the Process Scheduler Request page.
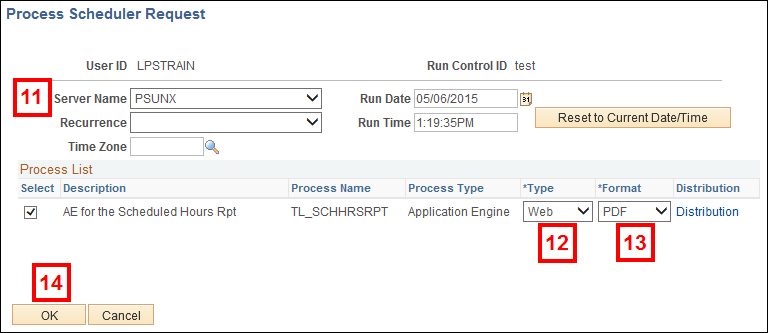
Run the Report
- Verify or select PSUNX from the Server Name down-down list.
- Verify or select Web from the Type down-down list.
- Verify or select PDF from the Format drop-down list.
- Click Run to run the report.
Process Scheduler Request Screenshot
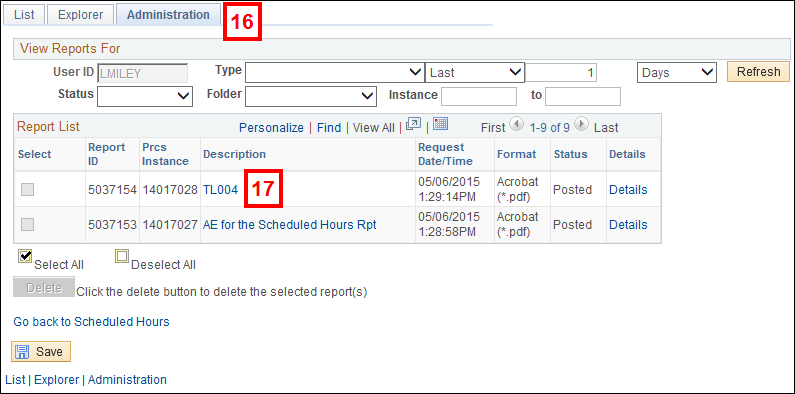
View the Report
- Click Report Manager.
- Click the Administration tab.
- Click the link in the Description field for the report (e.g. TL004).
Note: The report will open as a .pdf file.