Important Information
- Only staff from Shared Services Center (SSC) can create new static groups. If you need an additional static group, use the SSC - HR - Static Group Management Request form. After a static group is created, it is the responsibility of the unit to maintain it. For more information, see the SSC Paid Leave Balance website.
- If you do not know your unit's static group ID(s), contact the SSC.
- Maintaining a static group requires that you add employees who join your unit (e.g., new hires, transfers) and remove employees who leave your unit (e.g., terminations, transfers).
- Static Groups cannot be deleted, and they must include at least one employee.
- When adding an employee, you must add the employee record number (EMPL RCD) associated with the employee's job in your department. If you don't know this information, you can find it on the Job Data pages. See the Job Data – Field Descriptions document for more information.
Navigation
NavBar > Navigator > Set Up HCM > Security > Time and Labor Security > Static Group
Step-by-Step Process
- To access a static group:
enter the static group ID in the Group ID field,
OR
enter the static group description the the Description field.
Note: Do not click Search without entering any search criteria because all Group IDs will not display. - Click Search.
Add an Employee
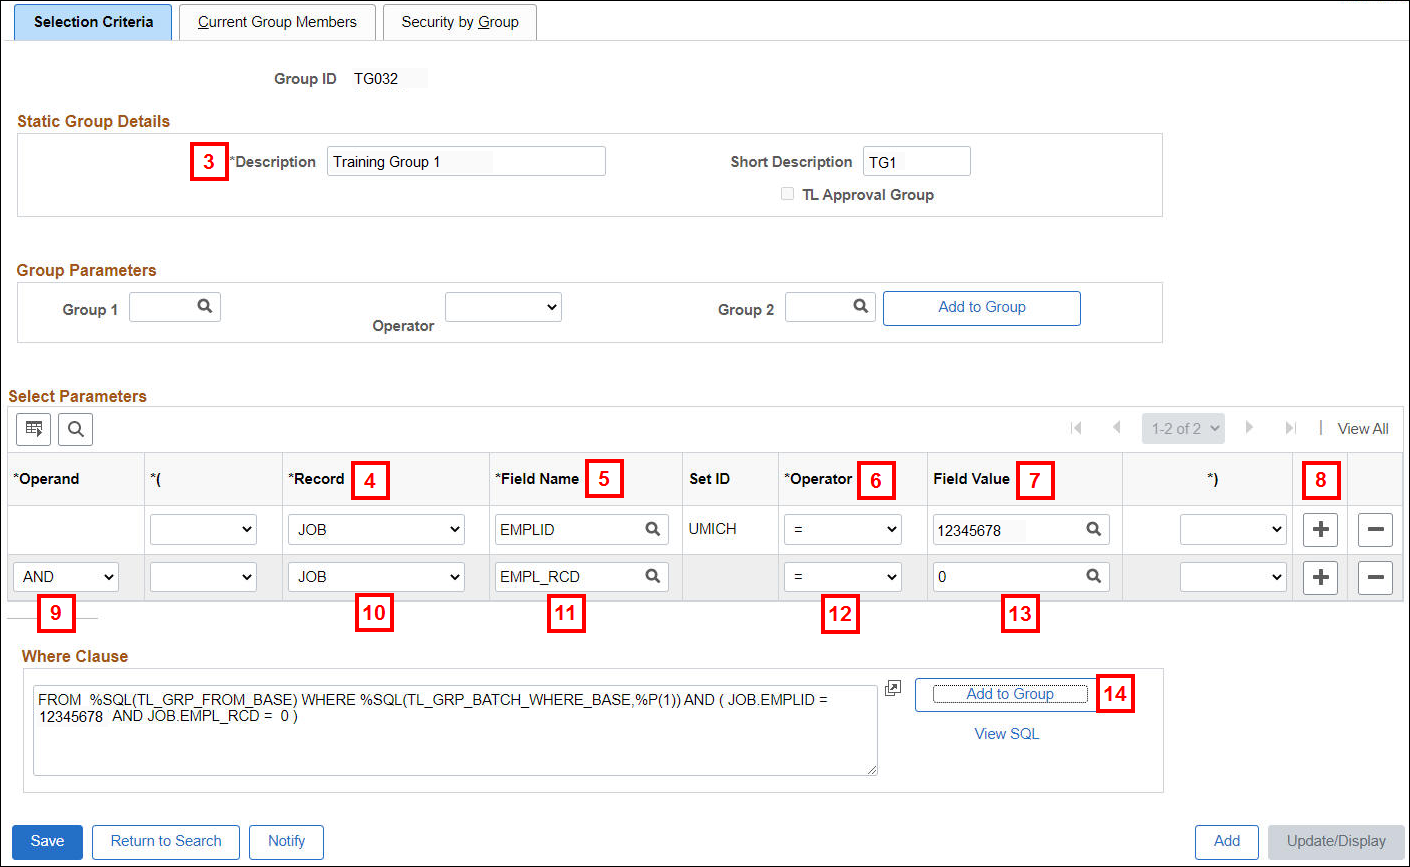
- Enter a description for the Static Group or verify the correct description displays in the Description field.
Note: Your uniqname should be used as part of the description. - Verify JOB displays in the Record field or select it from the drop-down list.
- Verify EMPLID displays in the Field Name field or enter it.
- Verify = displays in the Operator field or select it from the drop-down list.
- Enter the EmplID of the employee you want added to the static group in the Value field.
Note: If an EmplID already displays in the Value field, overwrite it with the correct EmplID. - Unless already displayed, click Add Row
 to add a second row.
Specify Employee Record Number
- Verify AND displays in the WHERE field or select it from the drop-down list.
- Verify JOB displays in the Record field or select it from the drop-down list.
- Verify EMPL_RCD displays in the Field Name field or type it.
- Verify = displays in the Operator field or select it from the drop-down list.
- Enter the appropriate employee record number (EMPL_RCD) associated with the employee's job in the Value field.
Note: If an EMPL_RCD number already displays in the Value field, overwrite it with the correct EMPL_RCD. - Click Add to Group in the Where Clause SQL box.
Note: Do not click Add to Group above the Select Parameters box. - Click OK in the web browser dialog box that displays the number of Time Reporter(s) (employees) added to the group.
Note: To add another employee to the static groups, repeat steps 7-15.
View the Static Group Members
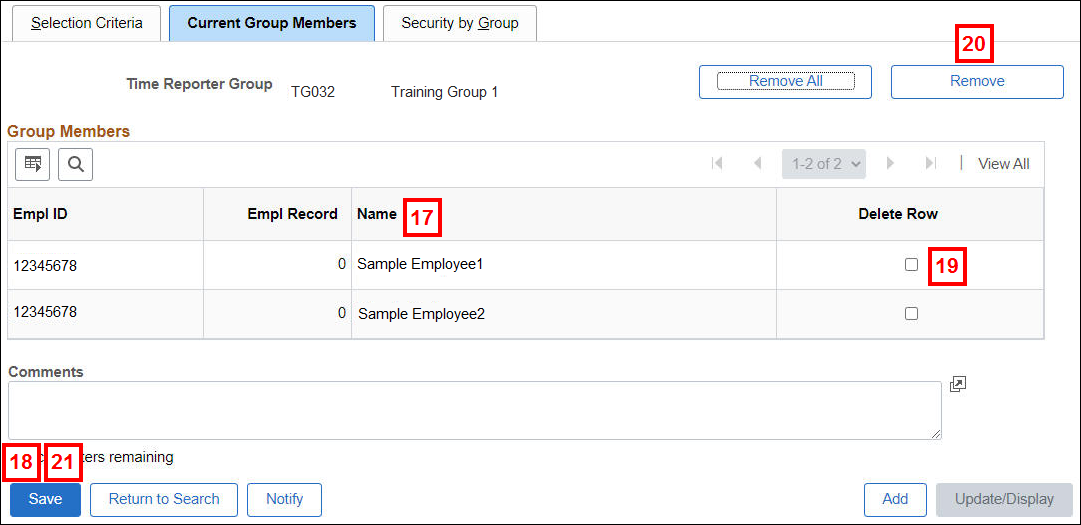
- Click the Current Group Members tab.
- To display the list of group members in alphabetical order (by last name), click the Name column header.
- If you do not need to delete any rows, click Save.
Current Group Members Screenshot
Remove an Employee
- To remove an employee or an Empl Rcd Nbr(s) from the static group, check the Delete Row box next to the appropriate row(s).
- Click Remove.
Note: Do not click Remove All. You cannot save your changes if you delete all the group members. - Click Save.