Important Information
- This procedure describes how to run (generate) the Leave Activity by Department report, which is one of two leave reports that can be generated as needed for reviewing leave usage and accruals.
- The steps for running the Leave Activity by Employee report are the same, except that only a date range and EmplID(s) are the report parameters.
- You can run a Leave Activity by Department report for one or more Department IDs at a time, but only for one type of pay frequency at a time. This is because employees with different pay frequencies have their leave usage reported and processed at different times.
- The two types of pay frequencies and the differences in how leave usage is reported and processed are:
- Biweekly: Leave usage is reported in the biweekly pay period it occurs, and then processed on the following Tuesday.
- Monthly: Leave usage is reported in the month it occurs, and then processed with that monthly payroll.
- Leave activity reports should be run after the payroll is processed for the dates you want to review.
- When running a leave activity report, enter a range of dates that is appropriate for the selected pay period, or for the employee's pay frequency.
- Before running a leave activity report, it is also important to consider when leave accruals are added to employees' balances. Monthly employees have them processed on the first of the month, and biweekly employees have them processed according to a schedule on the University Payroll Web site (normally around the first of a month).
Navigation
NavBar > Navigator > Time and Labor > Reports > Leave Activity by Department
or
NavBar > Navigator > Time and Labor > Reports > Leave Activity by Employee
Step-by-Step Process
Select a Run Control ID
- Click Search to display your existing Run Control ID(s).
- If applicable, select a Run Control ID from the Search Results list and skip to step 6.
Add a Run Control ID
- If a Run Control ID does not display, click the Add a New Value tab or link.
- Enter a name for the new Run Control ID.
Note: You can use letters, numbers, and underscores to name a Run Control ID, but you cannot use spaces, dashes, or other non-alphanumeric characters.
- Click Add.
Enter Parameters and Run Report
- To define the period of time included in the report, enter the appropriate dates in the From Date and Thru Date fields.
View Leave Activity by Department Page screenshot
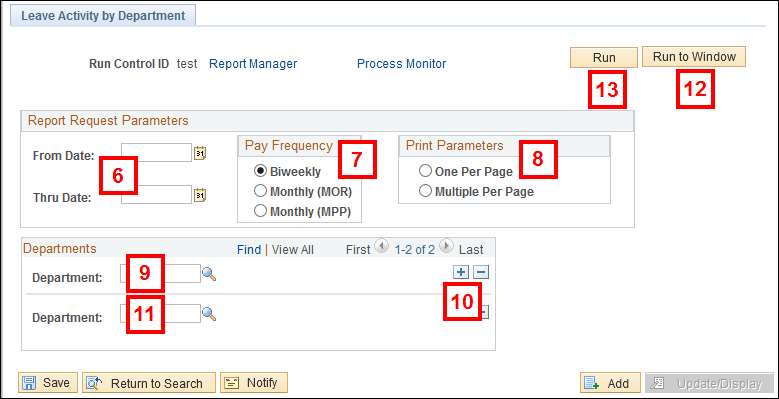
- Select the appropriate Pay Frequency radio button to identify the type of employees you want included in the report.
Note: There are two options for monthly employees:- MOR includes Campus staff.
- MPP includes Health System staff.
- To indicate how many employees you want to print on a page, select the One Per Page or Multiple Per Page radio button.
- Enter the Department ID in the Department field.
- If applicable, click Add Row
 for each additional Department ID you want to include in the report.
 - If applicable, enter the additional Department ID(s) in the Department field(s).
To run the report to PDF format, follow step 12.
- Click Run to Window.
Notes:
- A new browser window will open to display the reports processing status.
- The report will display in PDF format.
- Use your browser's print command to print the report.
- When you have finished viewing the report, close the report's browser window.
To run the report to Excel, follow steps 13-20.
- Click Run.
Note: The Process Scheduler Request page displays.
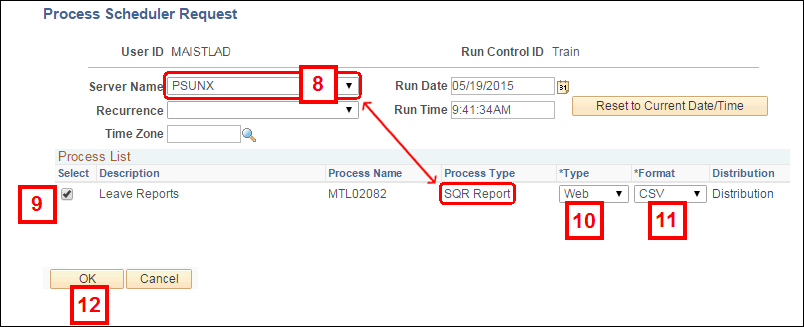
- Verify or select PSUNX from the Server Name drop-down list.
View Process Scheduler Request Page screenshot
Note: The Process Scheduler Request page displays.
- Select Web from the Type drop-down list.
- Select the CSV report format from the Format drop-down list.
- Click OK.
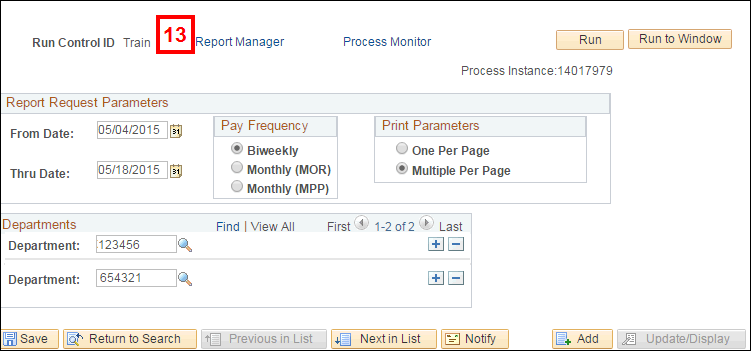
Note: The Leave Activity by Department page displays.
- Click Report Manager
View Process Scheduler Request Page screenshot
- Click the Administration tab.
View Report Manager Page screenshot
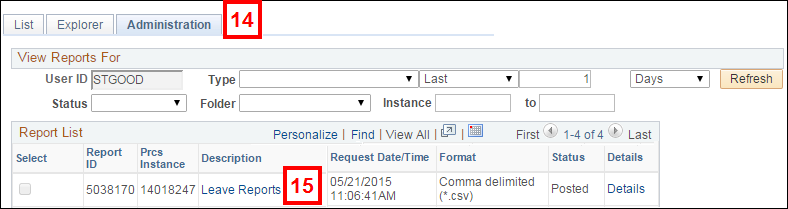
- Click the link in the Description field for the report (e.g., Leave Reports) to open the CSV data in Excel.