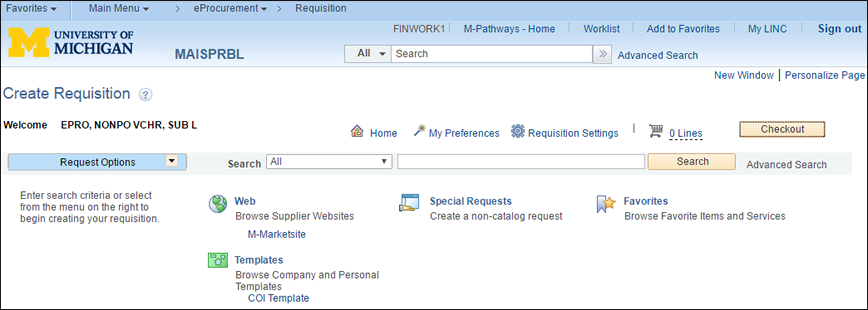
Create a Requisition Changes
When creating a requisition (req), you will follow the same steps, but the layout of the Create Requisition page will be different. What was once outlined in tabs at the top of the page, now follows a similar process to other online shopping experiences.
- Click Requisitions Settings to specify the req name, requestor, and other information that applies to the entire requisition.
Note: The Requisitions Settings must be populated before adding a Special Request line to avoid missing data warnings. - Select an item from the home page (e.g. Special Requests) to begin creating your requisition.
- Click Checkout to review the details of the req, make any necessary changes, and submit it for approval.
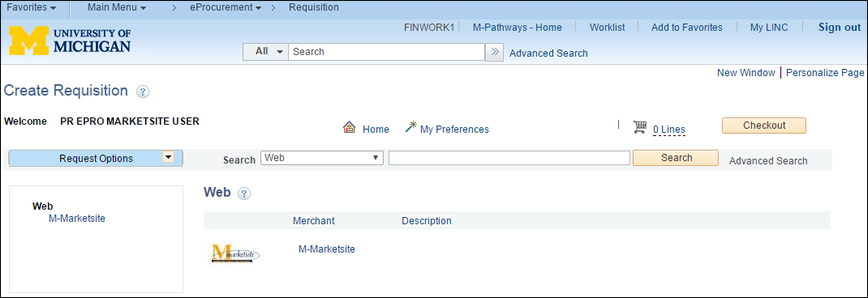
M-marketsite
M-marketsite users will experience quicker navigation:
- Connect to M-marketsite from the main Create Requisition page.
- After returning lines to ePro, you will be taken directly to the Checkout - Review and Submit page.
Create M-marketsite Requisition Screenshot