Overview
Expense Report Approver Responsibilities
Expense report approvers are responsible for reviewing the reports electronically routed to them to determine the appropriateness and reasonableness of the expenses according to U-M and unit expense policies and business processes. This includes, but is not limited to:
- Verifying that each expense is allowable and necessary, in that the:
- Business Purpose(s) is appropriate
- Appropriate ShortCode(s) is applied
- Appropriate Expense Type(s) is applied
- Exceptions to U-M/department travel or expense policies are justified
- Amounts due to the employee or university are accurate
- Reviewing imaged receipts and/or other supporting documentation for each expense for accuracy and legibility.
- Approvers may assign an employee as a delegate (Preview for Approver) to assist in reviewing expense reports for local policies and processes. This however, does not relieve approvers of their authority and responsibility for the expense approval. For instructions on how to add a Preview Approval Delegate, see Modify a Concur Expense Profile.
Concur Approval Process
Expense reports are available for review for seven days after the Date Submitted and then automatically return to the employee. The employee receives an email indicating that their expense report has not been approved promptly and asks them to re-submit it for approval.
The following lists the main steps in the Concur expense report approval process. Review this procedure in its entirety or click a link below to learn about a specific step.
Note: Each step may have multiple options to complete the task.
- Open an Expense Report
- View Expenses
- Enter Approval Comments
- View Receipts for an Expense Report
- Variation for "Preview Approval" Delegate: Notify Approver
- Approve an Expense Report
- Variation: Apply Additional Approval Workflow Prior to Your Approval
- Return an Expense Report
Step-by-Step Process
Open an Expense Report
Concur emails approvers when a report has been submitted for review. If a temporary “back-up approver” (i.e., approval delegate) is defined in the Concur Expense Profile, emails are sent to both the approver and approval delegate.
- From the approval email, review the Report Name and Purpose to identify the report requiring approval.
- Click View Report to log into Concur.
Note: If the report has not been approved or returned for correction within 5 days, a reminder email is sent.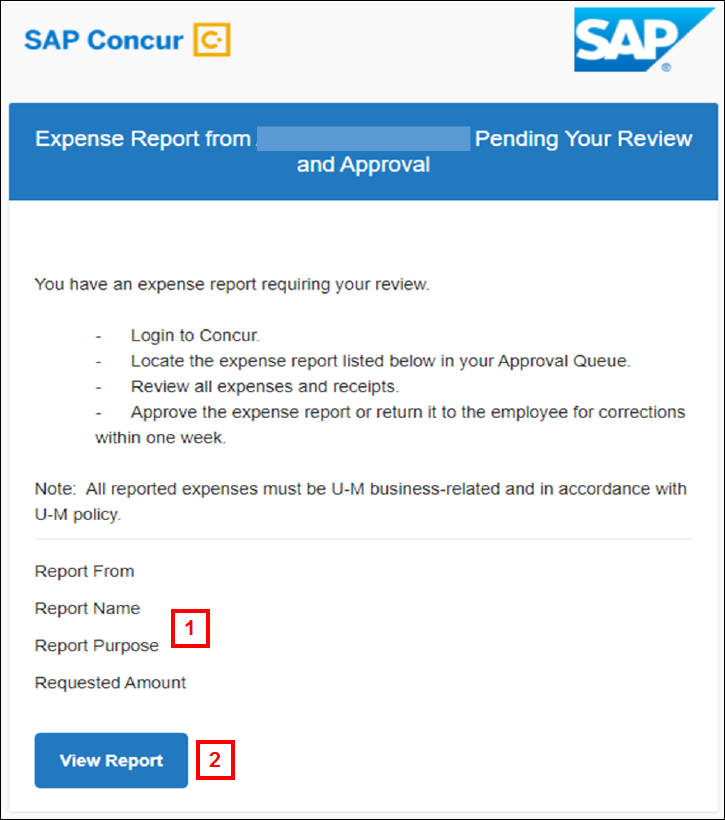
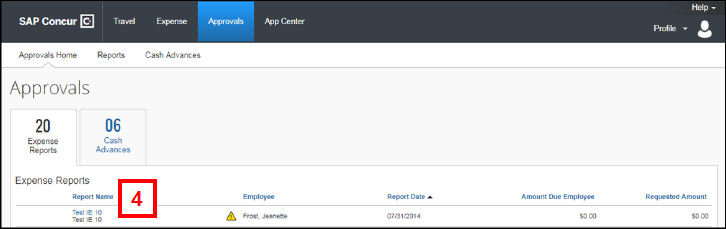
- Click Required Approvals in the Quick Task bar.

- Click the applicable Report Name.
View Expenses
To review expenses, click each line in the Expenses list to review the expenses individually.
- Click an expense line.
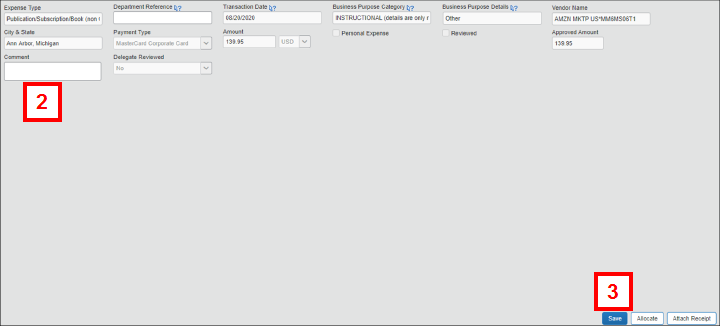
- View the expense line to verify that:
- The Expense Type is appropriate for the transaction.
- The Business Purpose Category and Business Purpose Details (if different from Header) explains why the specific expense is necessary and appropriate for the university and your unit.
- Comments provide explanatory information entered by the employee for the expense.
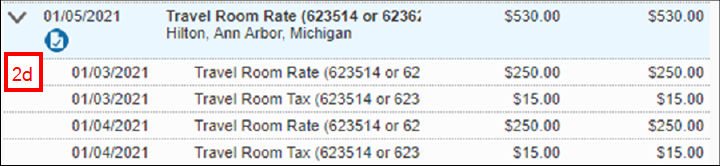
- Itemizations have been applied correctly to a transaction (as applicable).
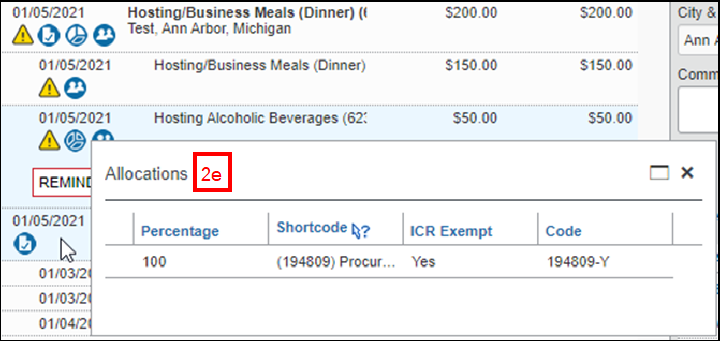
- Allocations have the appropriate ShortCode(s) and, if applicable, are marked as ICR Exempt (“Y”).
- Exceptions display if an expense exceeds or violates U-M Travel and Expense guidelines. Look for line or header Comments to view the employee’s justification for the expense (required).
- Repeat steps 1-2 for each expense line in the Expense Report.
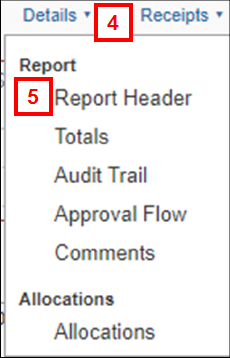
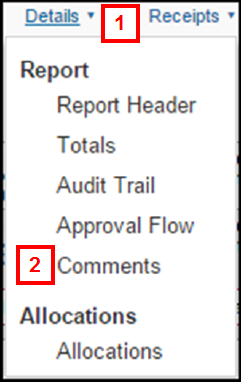
- Click the Details drop-down.
- Click Report Header and review:
- The Business Purpose Category and Business Purpose Details to ensure it explains that the overall purpose for the expense report is necessary and appropriate for the university.
- Whether the employee has provided a Comment for the report.
Note: The Comment field will not be grayed out, allowing you to enter a comment if necessary. - That the ShortCode is applicable.
Note: The ShortCode represents the default ShortCode for the Expense Report. It applies to all expenses, unless an expense is allocated at the line level.
- If applicable, for Fixed Meals (per diem), check the Travel Allowances to make sure the correct meals have been marked as provided.
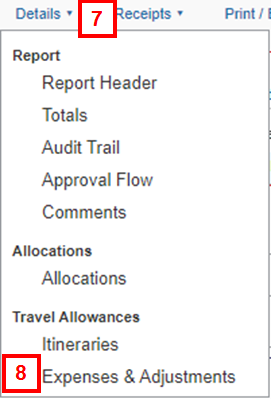
- Click the Details drop-down.
- Click Expenses & Adjustments.
- Review the meals that have been marked provided on the report from the Travel Allowances For Report pop-up on the Expenses & Adjustments tab.
Note: Dinner - Lunch - or Breakfast Provided indicates whether a travel meal was marked as provided for them therefore reducing the per diem expense.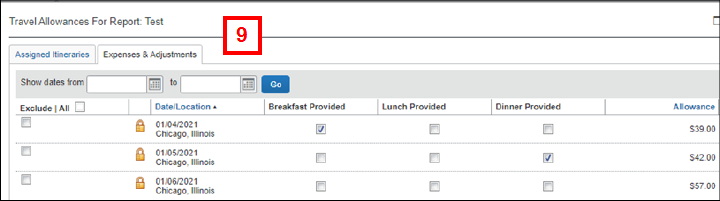
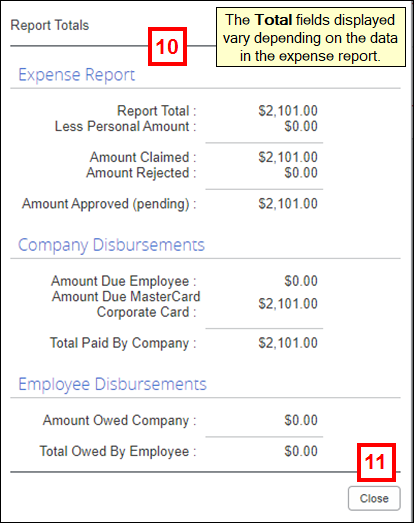
- Review the Totals section to verify the following information is accurate:
- Company Disbursements (amount due to employee or charged to a university credit card)
- Employee Disbursements (if applicable)
- Cash Advance (if applicable)
- Click Close.
Expense Type, Business Purpose Category, Comments Screenshot


Reconciliation Notes: The Report Name (first 20 characters) provides the Invoice ID and the expense line’s Business Purpose Details value (first 30 characters) provides the Line Description for the M-Pathways voucher. These values appear on the Voucher Detail Expense report used to reconcile the financial activity.
Enter Approval Comments
Comments for expenses need to be entered in the following situations:
- To approve an expense exception entered by the employee.
- To provide corrective information when returning the report to the employee.
Approve an Expense Line with an Exception
Both employee and approver comments are required to justify an exception for U-M auditing purposes. If the U of M Detail report displays Exceptions information for a line(s), verify that the employee entered a line or header Comment to explain the exception. If the employee hasn’t provided a comment, return the report for correction.
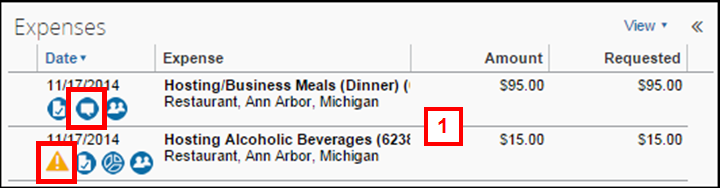
- Click the expense line with the exception.
- Exceptions and comments are identified by the following icons:
- Comments

- Exception Warning

- Comments
- Roll over the icon to view information in a pop-up window.
- Exceptions and Comments also display on the U of M Detail Report.
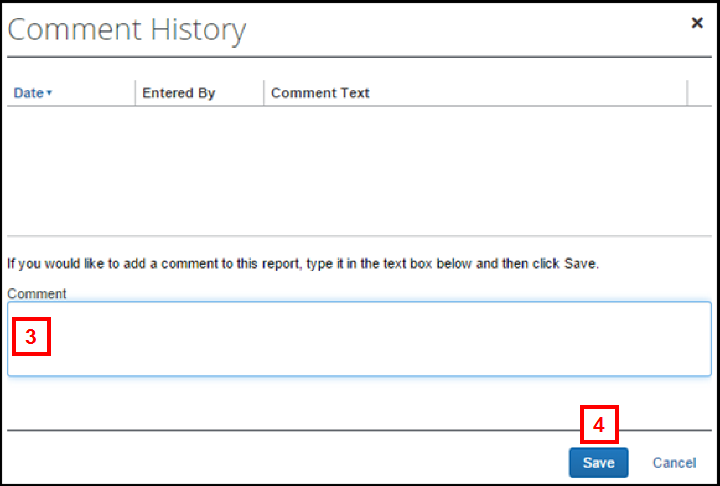
- Enter the unit's approval for the exception in the Comment field and include your initials in the comment.
- Click Save.
To return a report with an expense exception to the employee for correction, see Return an Expense Report.
Add Comments at the Report Header Level
Approvers may wish to add comments to the report header prior to approving, approving and forwarding. This can be done through the Details Menu.
- Click Details.
- Click Comments.
- Enter a Comment for the Expense Report.
- Click Save.
View Attached Receipt Images
Approvers need to verify which expenses require receipts and ensure that the receipts are:
- Attached to the report.
- Appropriate for the expense.
- Legible for auditing purposes.
Not all expenses require receipts, however receipts may be included for documentation purposes even when not required by U-M travel and expense policies.
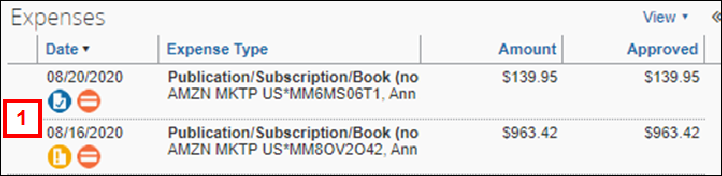
- Review the Expenses list to identify the receipt status for a specific line.
- A blue Receipt image available
 icon indicates a receipt is attached for the expense at the line level.
 - A yellow Receipt image required
 icon indicates that a receipt required by U-M policy is missing.
 - No icon indicates that a receipt is not required for the expense (per U-M policy).
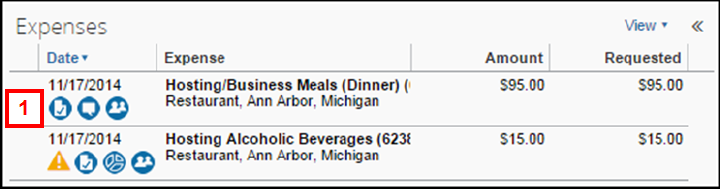
- A blue Receipt image available
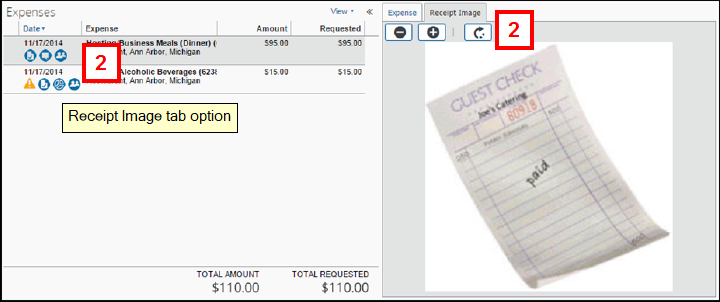
To view receipt images at the line level:
- Hover over the Receipt image available icon.
OR
Click the expense in the Expenses list to open the line, then click the Receipt Image tab.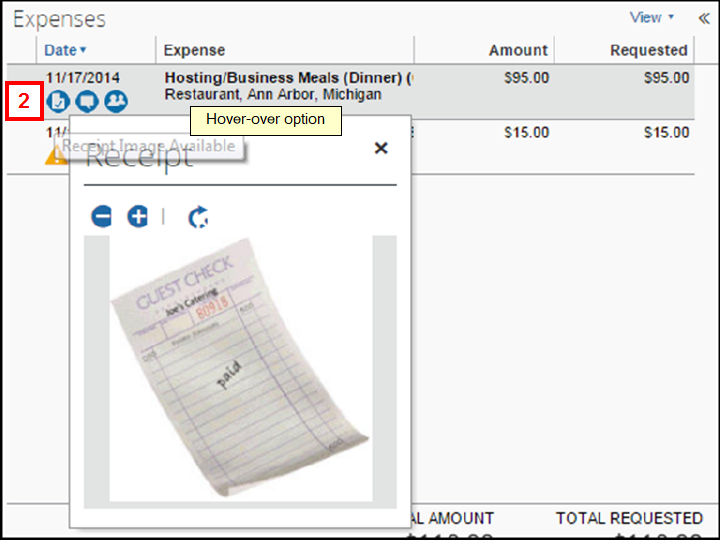
To view all receipts attached at both the line and report header levels as a PDF file:
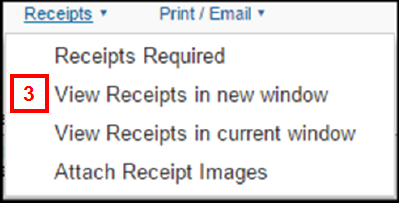
- Select View Receipts in new window from the Receipts drop-down list.
- If applicable, scroll down to review individual receipts.

- Close the receipt window.
If required receipts are not linked to the report or the images are illegible or inaccurate, return the report to the employee for correction. See the Return an Expense Report for instructions.
Notify Approver
If the expense report approver has assigned you as their “preview approval” delegate, verify the report data is complete and accurate prior to unit approval. As applicable, either send the report back to the employee for correction or notify the approver that the report is ready for their review.
Designating a “preview approval” delegate is optional. Check with your unit to determine if this delegate function is appropriate per unit business process.
- Review the report summary, detail, and receipts. If corrections are needed, click Send Back to Employee
OR
If corrections are not needed, click Notify Approver and the expense report approver will receive an email notifying them the expense report is ready for their review and approval.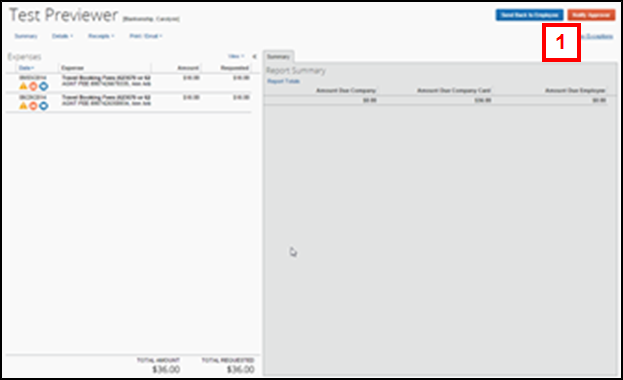
After clicking Notify Approver, the Delegate has reviewed this report  icon displays in the Approval Queue on the My Concur home page and indicates the delegate has completed their review.
Note: If the “preview approval” delegate subsequently marks the expense report as “not reviewed,” the icon is removed from the Approval Queue, but the approver does not receive a follow-up email.

Approve an Expense Report
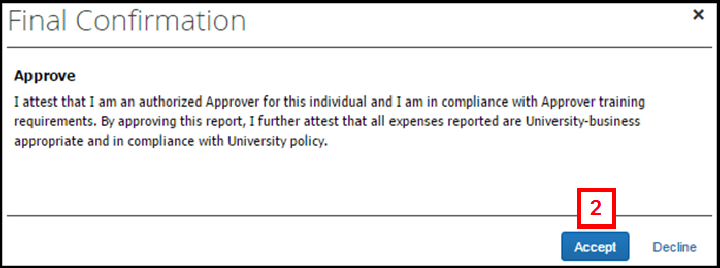
- After all expense lines and receipts has been reviewed and determined valid, click Approve.
- Click Accept on the Final Confirmation message.

If additional approvals are required:
- Click the + next to the Audit 2 (Internal Audit) field.
- Enter the approver's name in the User-Added Approver field.
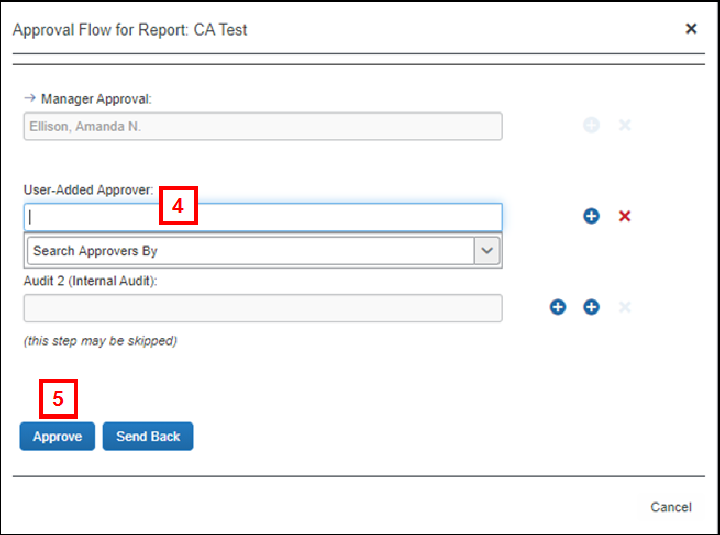
- If no additional approvals are required, click Approve.

Applying Additional Approval Workflow Prior to Approval
An approver can be added to the workflow if the expense report needs to be routed to another person (e.g., higher administrative authority for your department) for review. Check with your unit to determine what expense types or situations may require additional approvals.
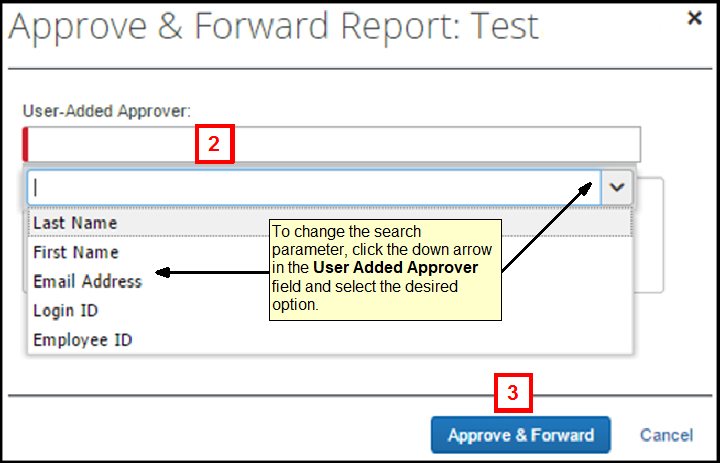
- Click Approve & Forward.
- Enter the approver's name in the User-Added Approver field.
- Click Approve & Forward.

Approve and Forward Screenshot
Return an Expense Report
If applicable, enter a line Comment to provide additional information and save prior to sending the report back to the employee.
- Click Send Back to Employee.
- Enter a Comment.
Note: All reports returned to employees for corrections require a comment entered by the approver. Be as specific as possible so the employee knows what steps to take to correct the report.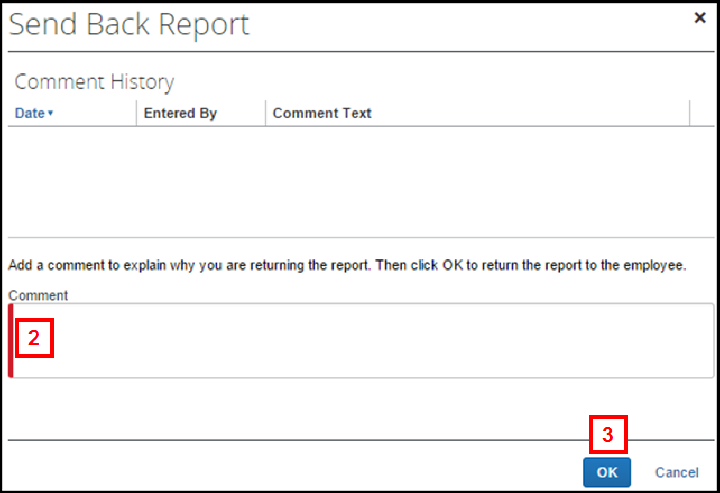
- Click OK.
