Overview
There are also several advanced features available in the edit screen. To get to the edit media page, click the Edit button in My Media or click Edit from the Actions button on the media view page.
TIPS:
- The title of your media is a clickable link to the Media View page. It serves the same purpose as Go To Media link that is displayed at the bottom of the media upload page, and other pages.
- The availability of the tools and features is dependent on user role and site configuration.
To the right of the player general user views information (if there are views) and publish status are displayed. Below the player are several tabs and buttons. Depending on your site’s configuration and your role, you may or may not see all the features and settings documented here.
- Details: The Details tab is displayed by default and allows you to update and save media metadata.
- Options: Control commenting and clipping of your media by other users. The available options are dependent on media type and your site’s configuration.
- Collaboration: Transfer ownership of your media and/or designate others as co-editors and/or co-publishers.
- Attachments: Attach files of type to the media entry so that viewers can download them.
- Captions: Upload your own closed caption files. If the media item is an image or audio file the captions tab won’t be displayed.
- Thumbnails: Upload thumbnail images for audio or video, or choose one from a video frame.
- Downloads: Enables media download.
- Timeline: Provides an editing environment to turn a video or audio file into a searchable, chaptered presentation with synchronized image slides
- Replace Video: Replacing media is great for swapping out the original upload with a new version without breaking embed code or losing analytics.
- Trim Video: Permanently trim beginning and/or ending footage from a video.
- Create Clip Button: Create a full or partial copy of your media entry.
Don’t confuse this media collaboration setting with the Canvas “Collaborations” tool in your course site.
Before You Begin
You should have one or more previously uploaded media items. See Uploading Media for more information.
Editing Features
Options Tab
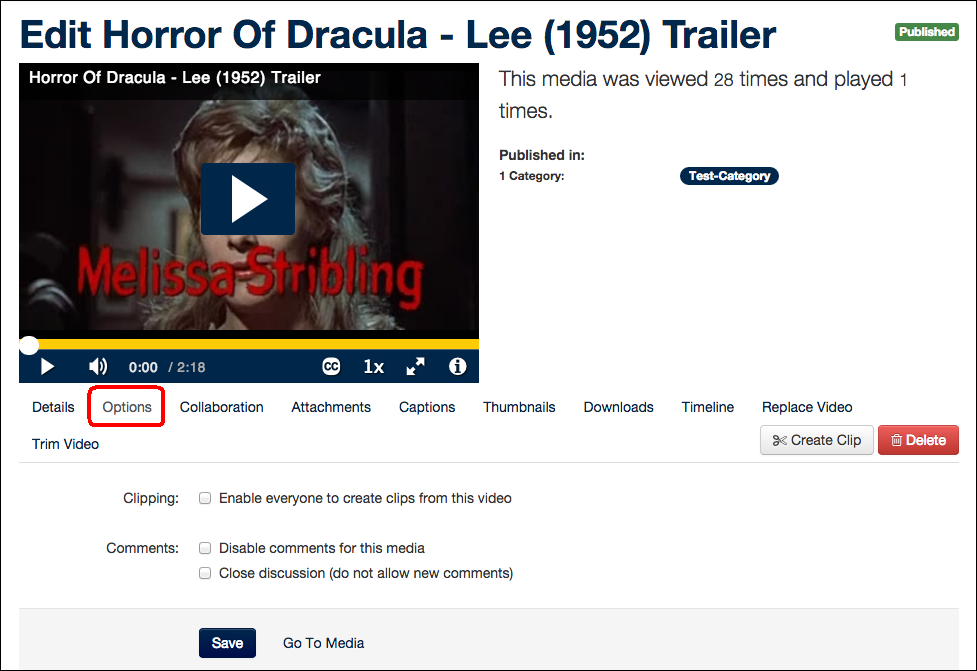
- Options are set on an individual entry basis.
- The available settings depend on your application’s configuration and media type (you can’t make a clip of an image, for example).
- In this case, clipping, which allows media owners to permit other users to make clips (copies) of their video, is turned on sitewide.
- By checking the clipping box and clicking Save, the media owner is allowing other logged in users to make their own editable copies of their video.
- Comments operate using reverse logic. When comments are enabled sitewide, they are enabled for all media. You can to choose to block and/or close comments via the options tab on a per entry basis.
Media Owners are always permitted to make clips (copies) of their own media without having to enable the clipping option.
Attachments Tab
Managing related files is a straight-forward process.
To add a new file, click the upload file button. The title and description are optional, but useful if the viewers cannot discern the contents from the filename.
Don’t forget to wait for upload progress bar to turn green before closing the window.In the attachments tab you can use the icons next to each file to manage that file.
View attachments tab screenshot
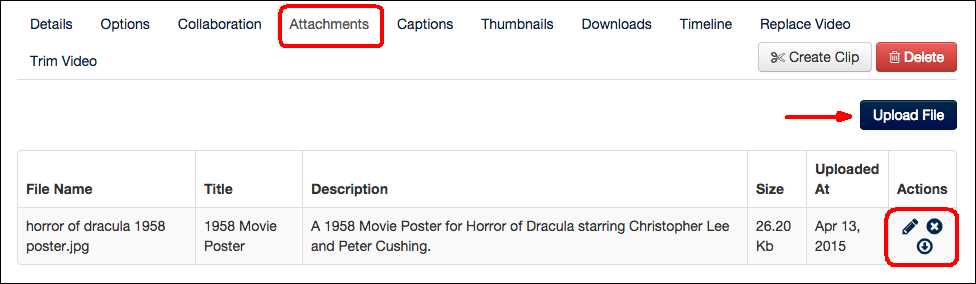
- Pencil Icon: Edits the file's title and/or description.
- X Icon: Deletes the file. This cannot be undone.
- Down Arrow Icon: Downloads the file.
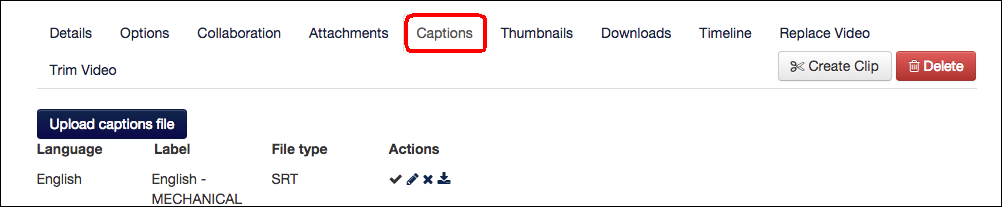
Captions Tab
Closed captions make your videos accessible to viewers with hearing impairments and are searchable in Mediaspace site, Canvas and Blackboard. The systems supports SRT and DFXP caption file formats.
You can upload more than one caption file. For example, you may have captions in more than one language.
Creating captions is beyond the scope of this tutorial, but there a lot of great resources available online from free to paid solutions.
- To upload a caption file, click Upload Captions and select your SRT or DFXP file.
- Choose the language the caption file is in from the Language drop-down box.
- Enter the text label that will display in the video player.
You can use the icons next to each caption to manage that file:
- Check mark icon: Sets the default caption (important when you have more than one caption file)
- Pencil/Save icon: When you click the Pencil to edit the language and/or label it turns into a Save icon. Be sure you click the Save icon to save your changes.
- X icon: Delete the caption file
- Down arrow: Download the file to your computer
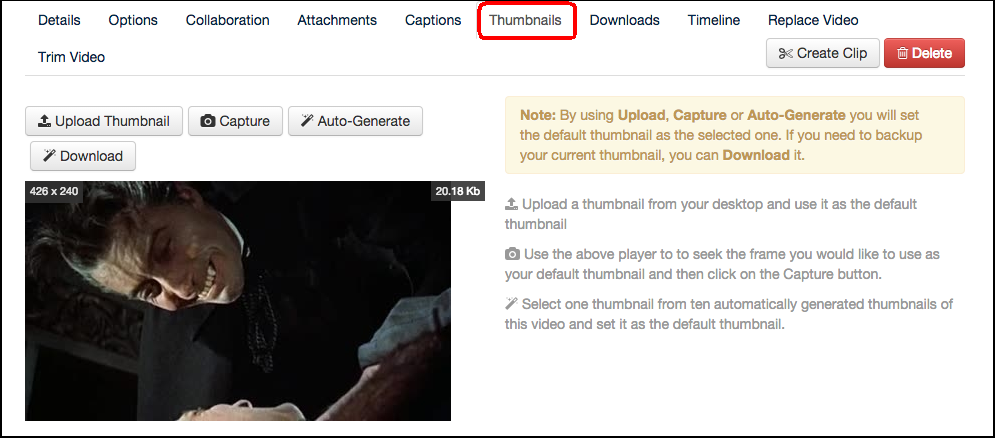
Thumbnails Tab
Tips- Adding a thumbnail is a great way to add context to an audio file. When editing the thumbnail for audio, upload is your only option. Creating a Timeline is another great tool for adding context and meaning, too.
- Once a custom thumbnail has been set, you can download it to your computer with the download button.
There are three methods for adding a custom thumbnails to a video:
- Auto-generate: The Auto Generate button is a fast way to set a custom thumbnail. It will create some images from your video for you to select from.
- Upload: When uploading an image thumbnail, best results are achieved if the image is in the same aspect ratio as the player (16:9) because the player will scale it to fit the player height.
- Capture: If you prefer to select your own image from the video, use the play/pause buttons and scrubber in the video player to display the desired frame, then click the capture button.
You can leave the video in paused mode to capture. The player buttons will not be included in the image.
View thumbnails tab screenshot
Downloads Tab
The download media module is enabled and configured by the site administrator. The site administrator determines which user roles can download media, and which file formats you can make available to those users.
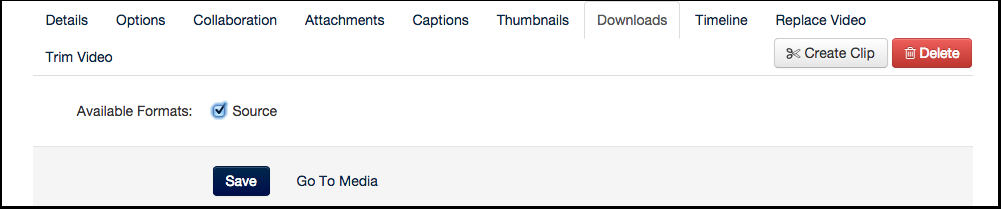
User role information is not provided on the downloads tab. Before enabling downloads, check with your site administrator if you are concerned about which user roles can download your media.
Replacing Video
Sometimes you need to make a change to a published video. Replacing video is a handy way to preserve analytics and prevent breaking embeds in other sites.
Replacing video with a timeline will break the timeline’s configuration. Be sure you document any timeline settings and have backups of your slides before replacing the video.
Tips:
- The “old” video will continue to display until processing is complete on the server.
- To replace audio, please contact 4Help or your KMC administrator for assistance.
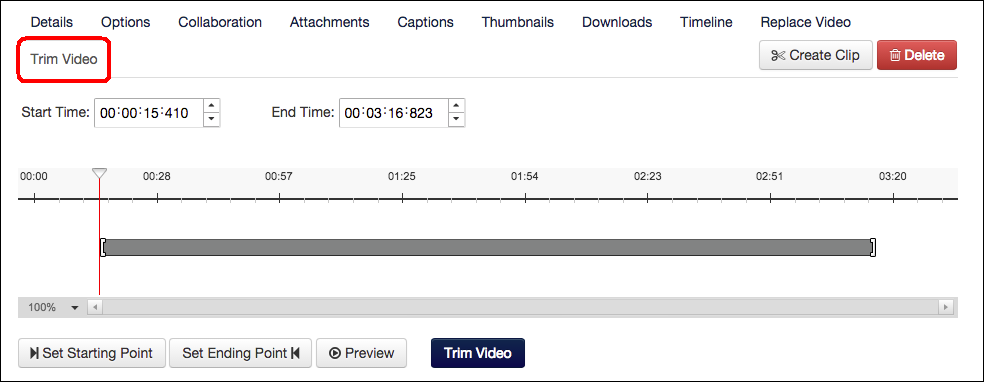
Trim Video Tab
Trimming allows you to permanently remove frames from the beginning and/or the end of a video.
Tips:
- To preserve the source video, consider making a clip first, then trimming that.
- For help with audio trimming, please contact 4help your KMC administrator.
- If you have deleted all the slides and chapters from a Timeline presentation but are still getting a message that trimming cannot be performed, just reload the page.
You can use any combination of the Start Time and End Time boxes, the gray selection slider in the middle of the timeline and the Set Starting Point and Set Ending Point buttons to trim your media. In the bottom left corner of the timeline, you can change the zoom to refine your selection. When you are satisfied with your trim, click the Trim Video button and confirm at the warning.
View trim video tab screenshot
Create Clips Button (make copies)
When enabled by the site administrator, clipping allows authorized users to make partial or full copies of video and audio files. Recall that media owners can always make clips of their own content. To allow other users to make clips, you must check the box in the Options tab on the Edit Media page.
You can create a clip using the Create Clip button on the Edit Media page, or by clicking “Create Clip from the Actions button on the Media page.
The clip selection settings are similar to trimming. You can use any combination of the in and out point tools to define your clip.
Remember that your clip is a new copy, so after saving your settings you must use the Go To Media button to use the advanced editing tools and publish it.
If you make a clip from a timeline video, your clip will inherit the timeline’s chapters and slides within the clip’s starting and ending points.